…Featuring: Beauty’s Bad Habit

Posted by Lipglossiping On August - 30 - 2011

Lily is a 19 year old beauty blogger hailing from one of my favourite UK cities, Manchester.  She has a penchant for indie cosmetics, inspiring looks and creating inventive ways to store your makeup!

Since first stumbling across Lily’s blog, I’ve been transfixed by her tutorials – she has the kind of creativity I could only dream of aspiring to.  Don’t believe me?  Read on as Lipglossiping.com features:  BeautysBadHabit

.

Take some black eyeliner, a leopard and an electric guitar, blend them together and what do you get? A freakin’ rock ‘n’ roll smokey eye, that’s what!  Or a really big mess…try explaining that one away to your insurance company.

1. Apply your eyeshadow primer as usual.  Cover your entire lid with a soft, black eyeliner and blend upwards just a tiny bit past the crease.  Don’t worry if it’s patchy, it will be covered up soon!
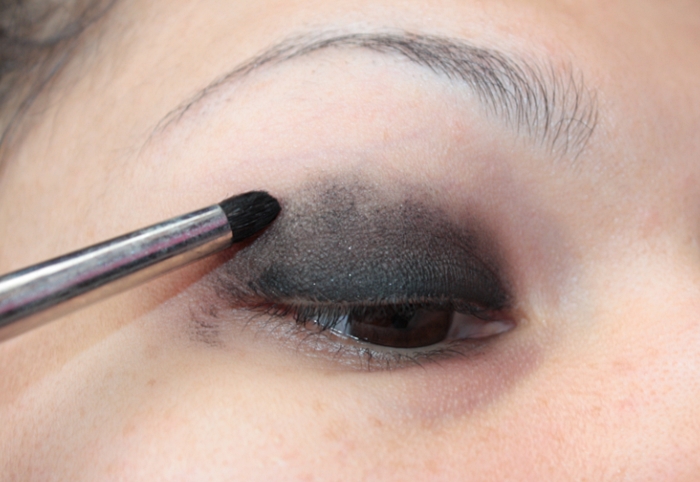
2. Pat a deep, shimmery eyeshadow over the black.  You can use any colour you fancy, purples and golden browns look great with this look, too.
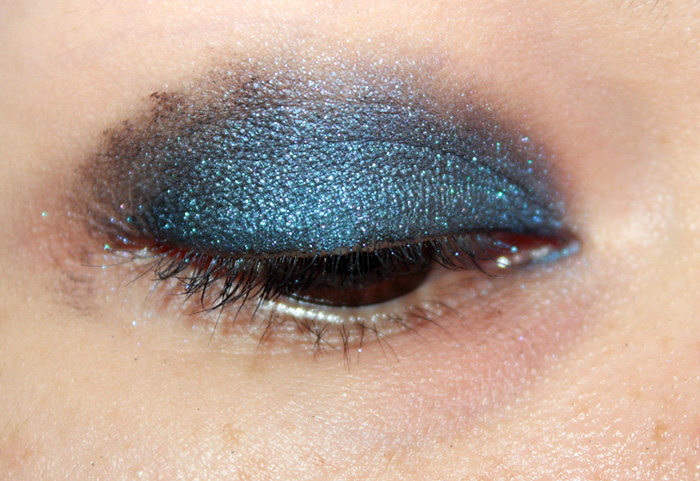
3. Now apply a matte highlight colour downwards from directly beneath the eyebrow.  Applying the highlight colour first makes it easier to blend past the crease in the next step…
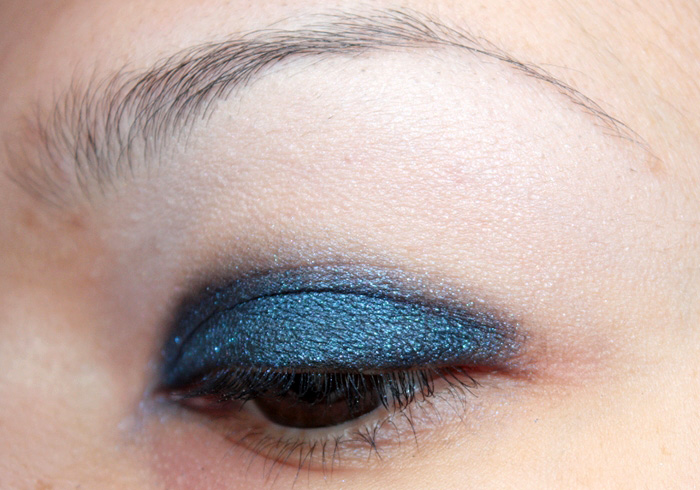
4. Use the same deep, shimmery colour on the lid to extend the eyeshadow shape upwards past the crease.  If you’re unsure of how to shape your eyeshadow, use your eyebrow shape as a guide.  If you don’t want to add leopard print to your look, skip to step seven.
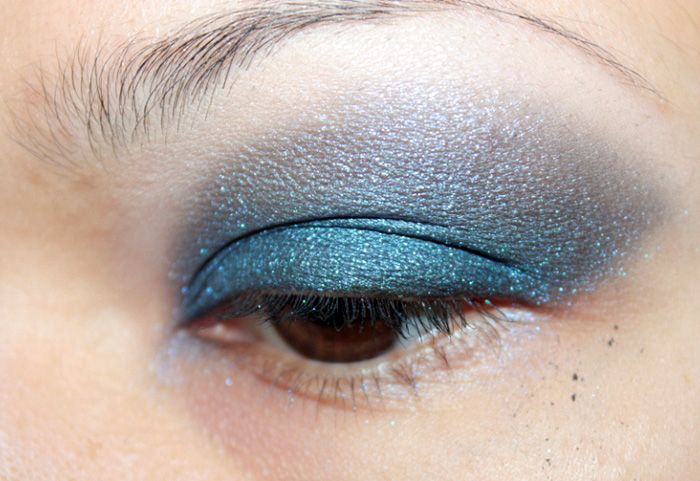
5. Squiggle some pale coloured dots, dashes and ‘C’ shapes above your crease.  Apply more at the outer edge and use fewer as you near the centre of your face.  I’ve used eyeshadow mixing with Illamasqua sealing gel, but coloured liquid eyeliners are definitely an easier option!
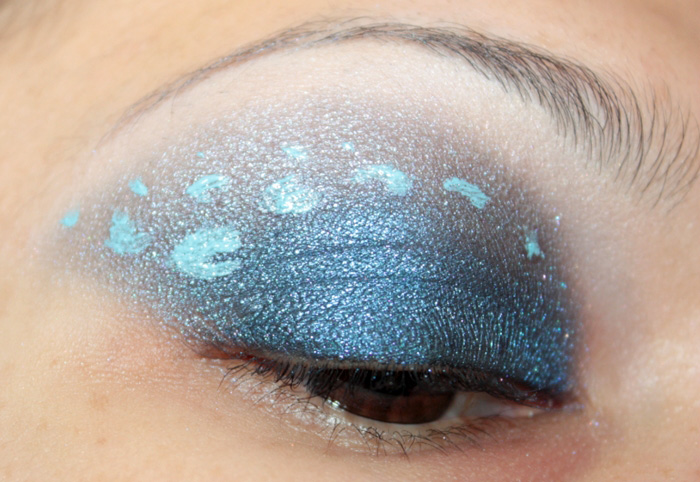
6. Outline your dots and dashes at the outer edges. You don’t have to be neat or even – how uniform are a leopards spots, after all?!
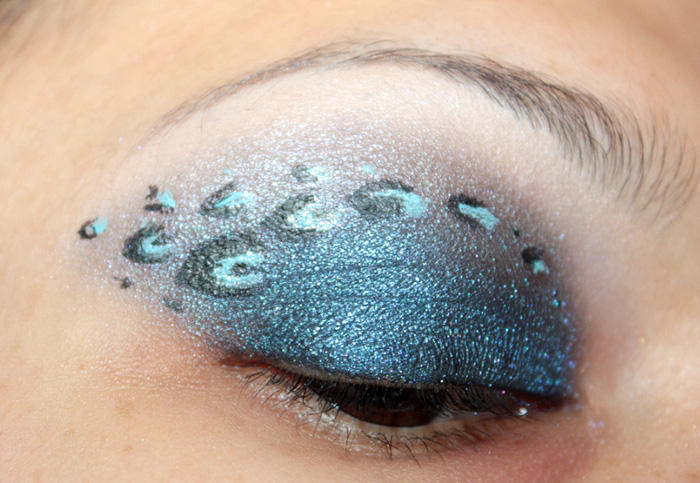
7. Extend the eyeshadow all the way around the eye.  Apply eyeliner to the waterline – I used a white and pressed the same pale blue eyeshadow I used for the dots over the top.  You could always use the usual black, though!
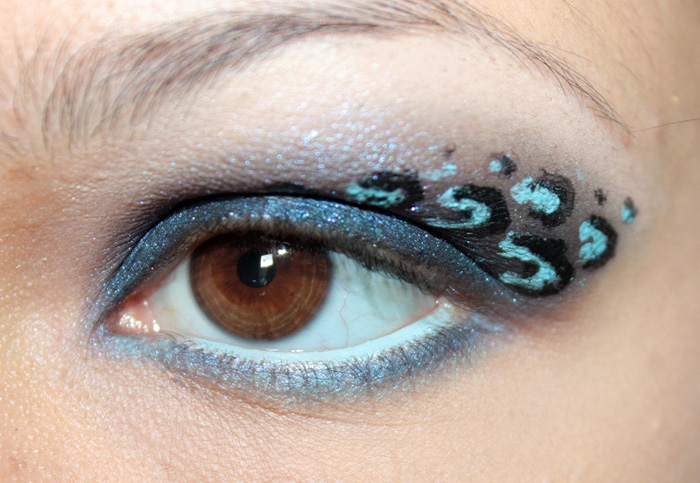

8. Apply mascara or false lashes and fill in your eyebrows.  If you decide to use falsies, opt for ones which aren’t very long, otherwise they will cover your leopard design up!
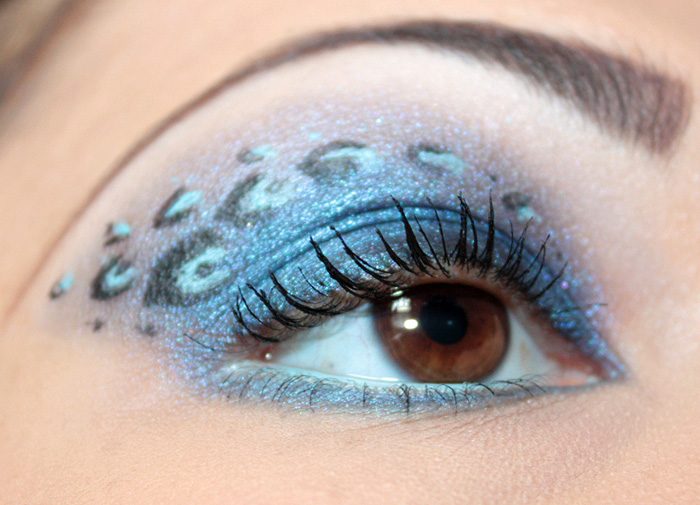
9. Bask in the glory of your awesome eye makeup 🙂

I finished off this look with peachy pink blush and a pink toned nude lipstick for a balanced and fresh finish. I’m not listing the exact products I used throughout since they’re not especially unique, you can pick up similar shades from any make-up company!

.

See what I mean about the talent?  Fiendishly awesome, thanks Lily!!


Pressing a BarryM Dazzle Dust (and other pigments)

Posted by Lipglossiping On March - 25 - 2010

As promised, my pigment pressing method…

It’s a mammoth tutorial and rather picture heavy, so please click ‘read more’ to continue on the pigment pressing adventure!

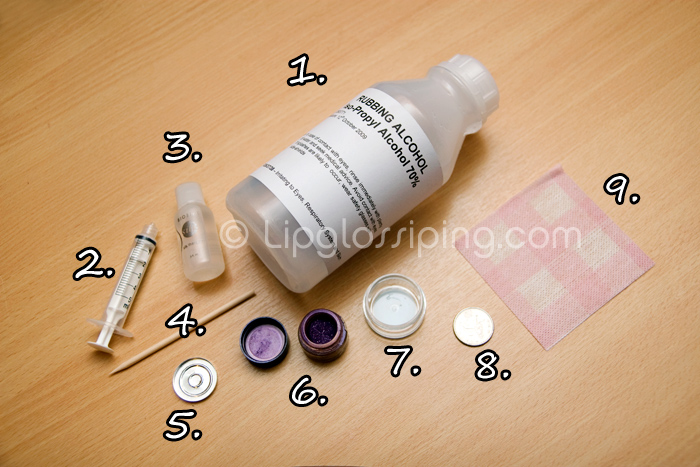
The cast of characters:

I’ve provided links of where you might purchase supplies, feel free to shop around – the links are there as a convenience only!

1. Minimum 70% Rubbing Alcohol (also known as surgical spirit or iso-propyl alcohol)

2. 5ml Syringe

3. Biosilk Silk Therapy (the link I provided is a VERY good price for Biosilk, I paid more than this)

4. Orange Stick or any suitable mixing tool you have to hand

5. Empty Palette or Pans (Those 26mm pans will fit in an ELF empty palette although may not be magnetized – easily fixed with a self-adhesive magnetic sheet though)

6. BarryM Dazzle Dust or pigment of your choice (Not MAC)

7. Suitable mixing container

8. 10 pence piece (I think the US size equivalent is a quarter?)

9. Textured material/kitchen roll

Read the rest of this entry »

Depotting Urban Decay’s Eyeshadow Primer Potion

Posted by Lipglossiping On October - 4 - 2009

That time had come… the moment I’d been dreading for almost 8 months.

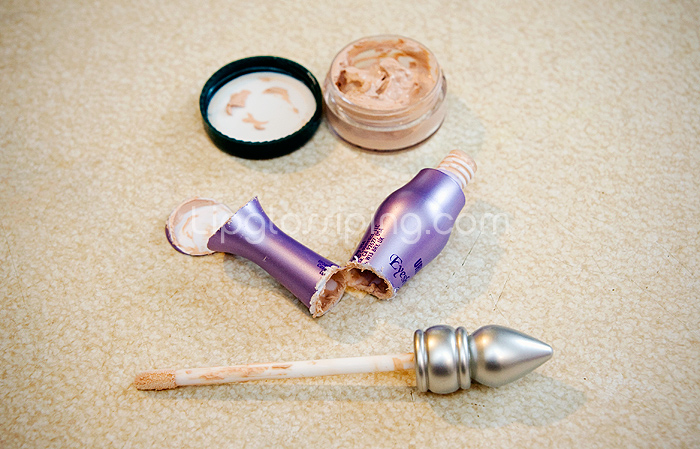
It was time to sacrifice the UDPP packaging in the quest for more product.

Thanks to some advice and gentle nudges in the right direction from the lovely girls on Twitter (AbbieandBrian, Lollipop, Ally, cosmetic-candy, melovemakeup, get_lippie, slaphappybeauty & Rhamnousia) I felt a little more confident that I could depot without removing most of my fingers in the process.

Here we go:

udppdepot

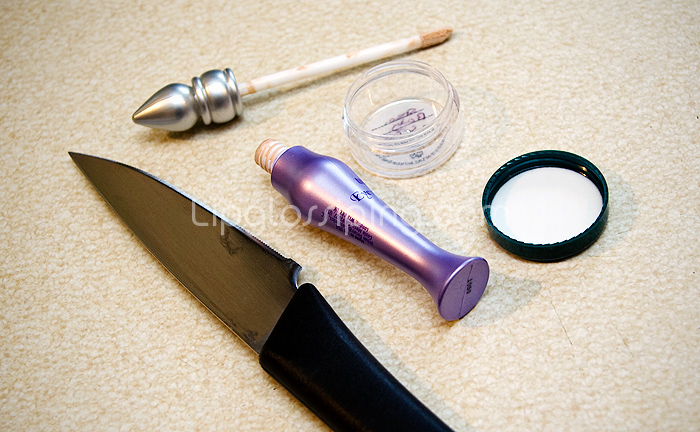
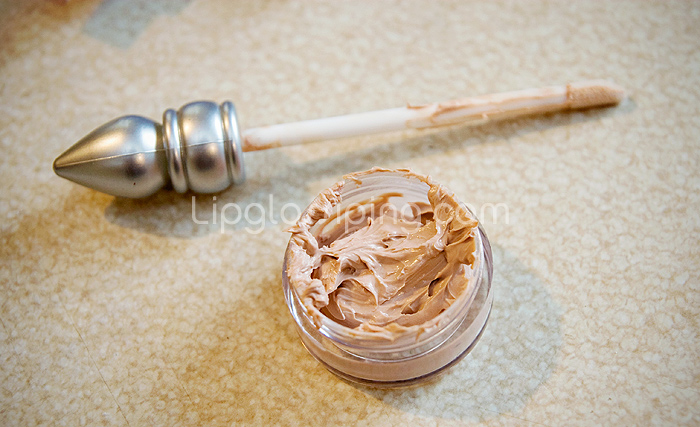
The cast of (necessary) characters.  I’m using a Body Shop sample pot – did you know that you can ask for a samples in The Body Shop?

udppdepot1

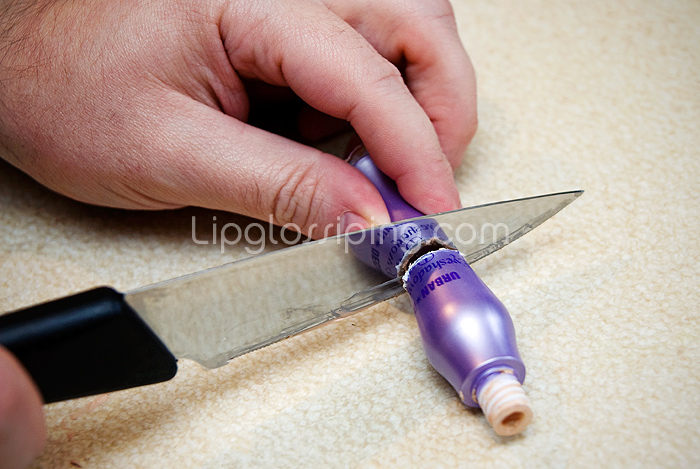
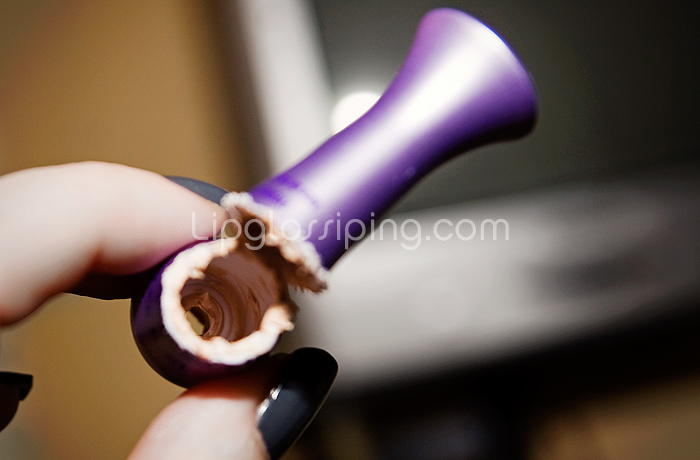
Grab your boyfriend, husband, dad (or someone else you can palm this thankless task onto) and get them to saw straight through the middle.  Make sure you’re using a knife with a serated blade!

udppdepot2

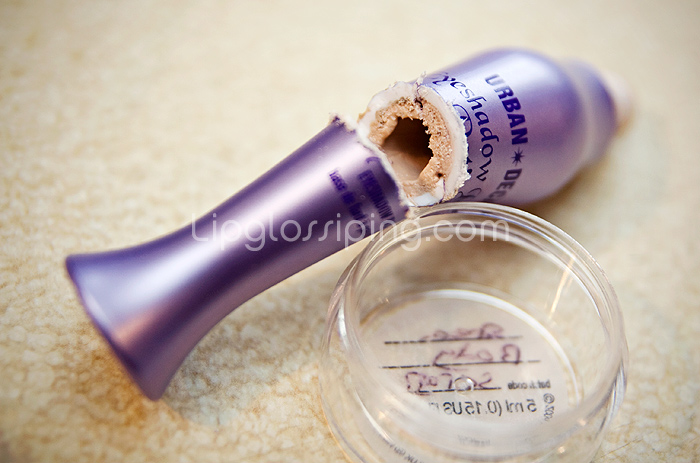
Ta-Da! Look at all that product!

udppdepot3

Look! That’s enough to keep me going for another month right there!

udppdepot4

All scraped out..

udppdepot5

Goodness me, that would have gone in the bin if it weren’t for all you lovely bloggers alerting me to the packaging shame that is UDPP

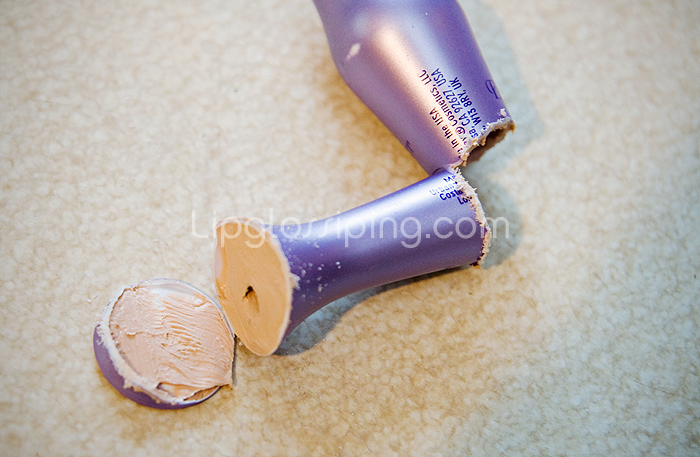
But wait! There’s more! – Get that knife back out and start sawing the bottom of the tube too, ‘cos look!

udppdepot6

Yes! Shame on you Urban Decay!

udppdepot7

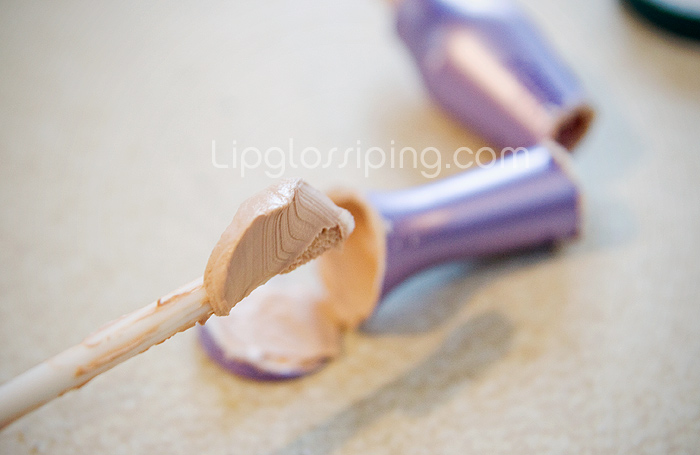
Get every last splodge!

udppdepot8

Et Voila! One dead UDPP tube and one very nearly full pot of Primer Potion.

I know, I know… there’s hundreds of these tutorials about now in the blogosphere and on youtube.  I should know, I’ve watched most of them…

Why add to it?  Well… because DESPITE that – I very nearly just binned the UDPP without doing this.  I figured it would be too much hassle, too hard, too whatever other lazy ass excuse I could come up with.

It was fine.  I mean, it was hard work waiting patiently whilst my husband sawed through the middle bit… FASTER *whipcrack* – but he got there in the end.  So, I’m happy to saturate the UDPP depotting tutorial presence on the internet if it helps bully YOU (or your general dogsbody) into making sure you do this when the time comes.

RANDOM

Jemma Kidd Air Kiss Gloss Trio

That time had come… the moment I’d been dreading for almost 8 months. It was time to sacrifice the UDPP packaging in the quest for more product. …

The Lipstick League – week of 22.8.11

That time had come… the moment I’d been dreading for almost 8 months. It was time to sacrifice the UDPP packaging in the quest for more product. …

YSL Le Teint Touche Eclat Foundation Review

That time had come… the moment I’d been dreading for almost 8 months. It was time to sacrifice the UDPP packaging in the quest for more product. …

Look what I've got....

That time had come… the moment I’d been dreading for almost 8 months. It was time to sacrifice the UDPP packaging in the quest for more product. …

Dry Skin? Putting a cold weather skincare plan into action...

That time had come… the moment I’d been dreading for almost 8 months. It was time to sacrifice the UDPP packaging in the quest for more product. …

Liz Earle Rose and Lavender Special Edition Cleanse & Polish available TODAY

That time had come… the moment I’d been dreading for almost 8 months. It was time to sacrifice the UDPP packaging in the quest for more product. …

rock polka dotted nails with Nail Rock!

That time had come… the moment I’d been dreading for almost 8 months. It was time to sacrifice the UDPP packaging in the quest for more product. …

Posing so hard, bitch needs a wind machine... (oh and some lashes)

That time had come… the moment I’d been dreading for almost 8 months. It was time to sacrifice the UDPP packaging in the quest for more product. …

Know a thing or two about beauty? Instyle & Selfridges NEED you!

That time had come… the moment I’d been dreading for almost 8 months. It was time to sacrifice the UDPP packaging in the quest for more product. …

Deal Alert: Elemis get ready for April Showers with a 2for1 offer!

That time had come… the moment I’d been dreading for almost 8 months. It was time to sacrifice the UDPP packaging in the quest for more product. …

POPULAR

CLOSED: Competition Time: Givenchy Very Irresistible L'eau en Rose Perfume!

That time had come… the moment I’d been dreading for almost 8 months. It was time to sacrifice the UDPP packaging in the quest for more product. …

CLOSED - Win it! The Body Shop Expert Brush Collection

That time had come… the moment I’d been dreading for almost 8 months. It was time to sacrifice the UDPP packaging in the quest for more product. …

Win a gorgeous "glow" trio with prizes from Urban Decay, New CID, & Arbonne!

That time had come… the moment I’d been dreading for almost 8 months. It was time to sacrifice the UDPP packaging in the quest for more product. …

Hello? Is this thing on?

That time had come… the moment I’d been dreading for almost 8 months. It was time to sacrifice the UDPP packaging in the quest for more product. …

Avoid the brush off with Oral-B Pro-Expert

That time had come… the moment I’d been dreading for almost 8 months. It was time to sacrifice the UDPP packaging in the quest for more product. …

Big savings on French Pharmacy brands, win my Escentual.com top picks!

That time had come… the moment I’d been dreading for almost 8 months. It was time to sacrifice the UDPP packaging in the quest for more product. …

Win it! 3 EcoTools Bamboo Bronzer Brushes to win!

That time had come… the moment I’d been dreading for almost 8 months. It was time to sacrifice the UDPP packaging in the quest for more product. …

FOTD Busting out of the comfort zone!

That time had come… the moment I’d been dreading for almost 8 months. It was time to sacrifice the UDPP packaging in the quest for more product. …

Dear Obesity...

That time had come… the moment I’d been dreading for almost 8 months. It was time to sacrifice the UDPP packaging in the quest for more product. …

Urban Decay The Black Palette - Photos & Swatches

That time had come… the moment I’d been dreading for almost 8 months. It was time to sacrifice the UDPP packaging in the quest for more product. …

COMMENTS

  • Categories

  • Archives

  • Admin

  • Ads