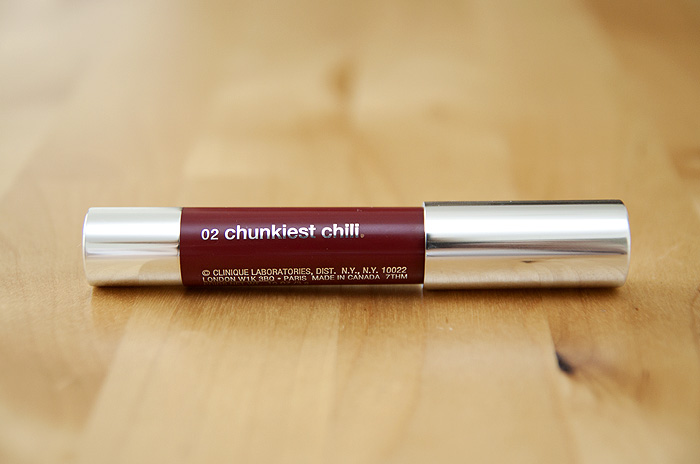
Clinique Chubby Stick INTENSE in Chunkiest Chili

Posted by Lipglossiping On October - 8 - 2012

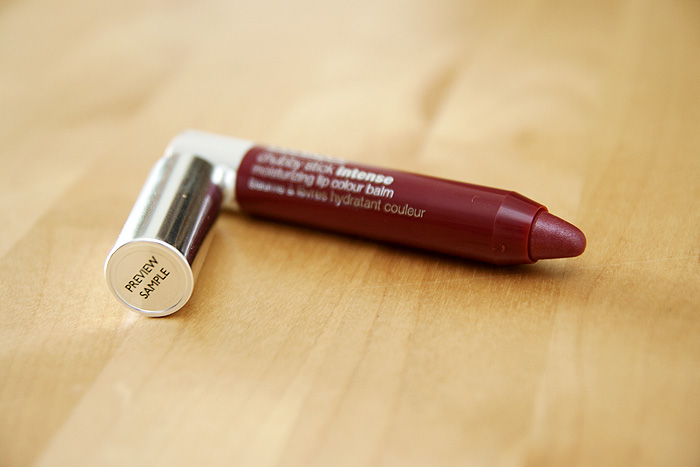
In the most outrageous flirtation with alliteration that I’ve witnessed since I submitted my year 10 English coursework, Clinique have released a new line of Chubby Sticks, and this time… they’re intense.  Chubby Chunkiest Chili (oh, come on!) is one of 8 new shades to feature in the lineup of pigment-packed lip colours and it looks something like this…

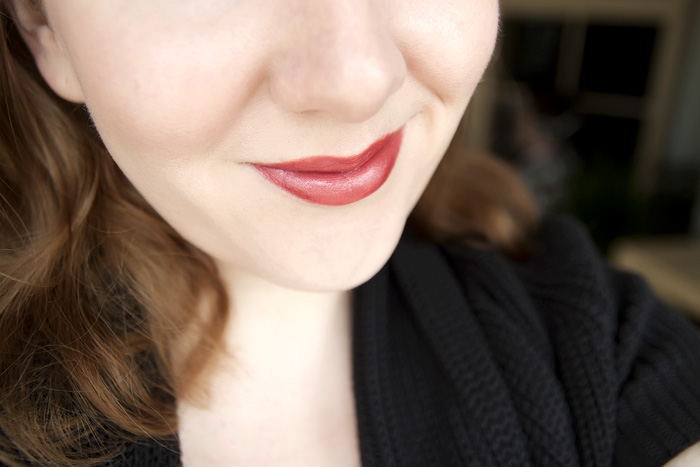
You should know by now that while I feel there’s a time and a place for sheerer lip coverings, my heart lies with lip products that deliver COLOUR aswell as polish.  Well, I’m pleased to report that Chunkiest Chili does indeed deliver a bold brick-toned red to my unpigmented pout whilst managing to retain most of the glossy, slightly balmy finish of the original Chubby Sticks.

You’ve got to love a lip stick that doesn’t need sharpening… twist up, twist down.  No compromise on usability.

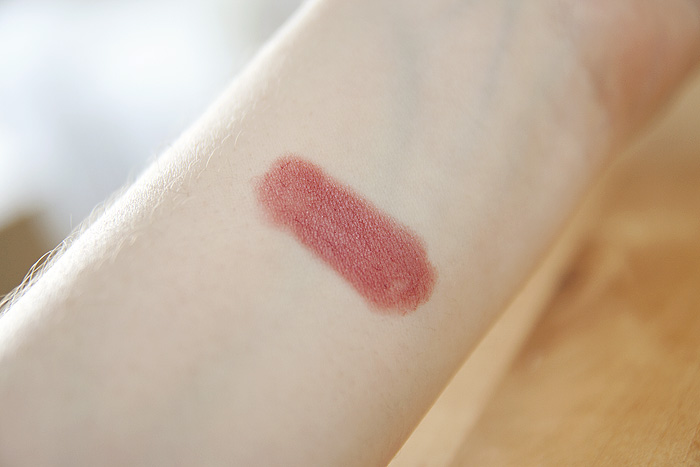
The swatch looks promising…

Ta-da!  Proper colour!  From a Chubby Stick!  *listens for angels*  Seriously though, if you’re a big fan of the Chubby Stick formula, ease-of-use… whatever but feel that they’ve been too sheer and balmy for you *puts hands up*, this is your answer, right here.

Clinique Chubby Stick Intense is available in 8 shades: Curviest Caramel, Chunkiest Chili, Heftiest Hibiscus, Mightiest Maraschino, Plushest Punch, Roomiest Rose, Broadest Berry, and Grandest Grape priced at £16 each.

The only problem is, you’re gonna have to wait until mid-November to get your hands on them!  Cool those heels ladies!

* press sample


Wordless Wednesday

Posted by Lipglossiping On September - 19 - 2012

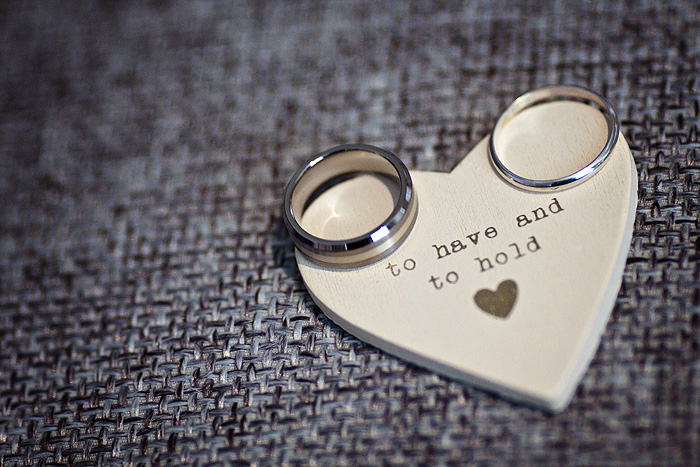
(it was mine and Mr. L’s 8th wedding anniversary yesterday – we’re getting OLD!)

p.s. back from holiday tomorrow.

p.p.s I don’t want to come home, Prague is as beautiful as ever.

China Glaze Summer Neons collection: Pink Plumeria

Posted by Lipglossiping On June - 23 - 2012

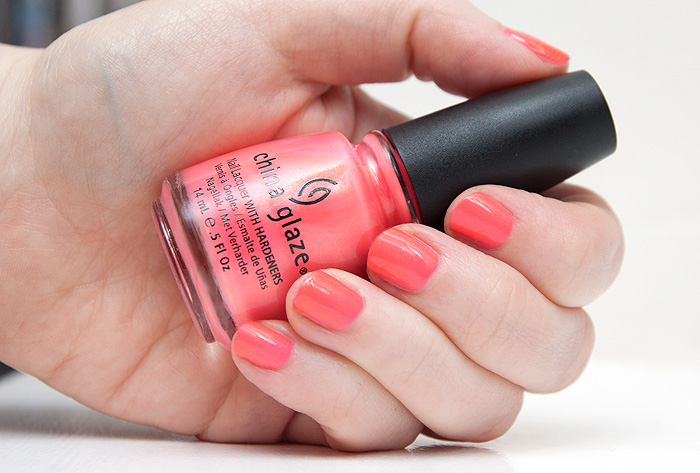
I thought I’d start swatching the China Glaze Summer Neons collection with my favourite (at least from just looking at the bottles): Pink Plumeria*.  It’s a bright coral which definitely leans more towards the pink side of the spectrum, making it an excellent choice for those of us who might usually struggle with the warmth in traditional coral shades.  Pink Plumeria, to my eye at least, carries a really subtle duochrome – I’m not sure if this is intended, or is simply a result of the golden shimmer packed within.

You can see on the nail tips, there’s definitely more golden tones than toward the base of the nail bed.  The formula on this one was ok… a bit prone to pooling, so definitely paint this one on in thinner strokes.  This is going to be such a lovely pedicure shade too, I’m feeling the love for this one!

China Glaze Pink Plumeria is available to buy instore from Sallys or online at RadiantBabe-Beauty, priced from £6.75

* press sample

The Lipstick League – Week of 11.06.12

Posted by Lipglossiping On June - 17 - 2012

Question of the Week: – What higher-end product(s) in your beauty arsenal do you consider absolutely splurge-worthy?

Answer:- I’m currently having a love affair with my Chanel Illusion d’Ombre eyeshadows, probably the most perfect cream formula I’ve tried and well worth the splurge over high-street alternatives.  The other thing in my makeup bag that JUMPS out at me is my Guerlain Meteorite Perles – love, love, love for that illuminated-yet-never sparkly skin finish.

.

Krasey Beauty – Krasey Beauty waxes poetically, literally, about the new Make Up For Ever Aqua Shadow Pencils.

Lipglossipinggets her tongue in a twist with the pronunciation of a well-known French beauty brand!

Nouveau Cheap – Whether you like your bronzers and highlighters matte or full of sparkle, the latest releases from NYX have got you covered.

Pink Sith – tries out Marc Anthony’s (no that THAT Marc Anthony) Dream Waves Amplifying Collection and she get’s beautiful beachy waves and curls as a result!

Phyrra – brings you the best bright hair from Premiere Beauty.

Vampy Varnish – loves the new LORAC Wild For TANtalizer collection and thinks you will as well!

we heart this – From clear pits to coral tips, see what Glam.com predicts will be the hottest products for summer.

Beauty Junkies Unite – If you’re tired of your eyeshadow creasing or disappearing, then you will not want to miss these long-wearing 12HR waterproof cream eyeshadow pencils that Amber reviewed from Milani Cosmetics!

Clumps of Mascara – reviews Maybelline BB Dream Fresh. This, lovelies, is a ginormous deal since very few BB creams come in shades for women of color. Yay for this one!

EauMG – Victoria reviews a creamy, dreamy white floral perfume by Annick Goutal.

Gouldylox Reviews – Is still learning how to manage her now long hair. This week was a major FAIL. Here’s why.


What higher-end product(s) in your beauty arsenal do you consider absolutely splurge-worthy?

Butter London Disco Biscuit NOTD

Posted by Lipglossiping On May - 21 - 2012

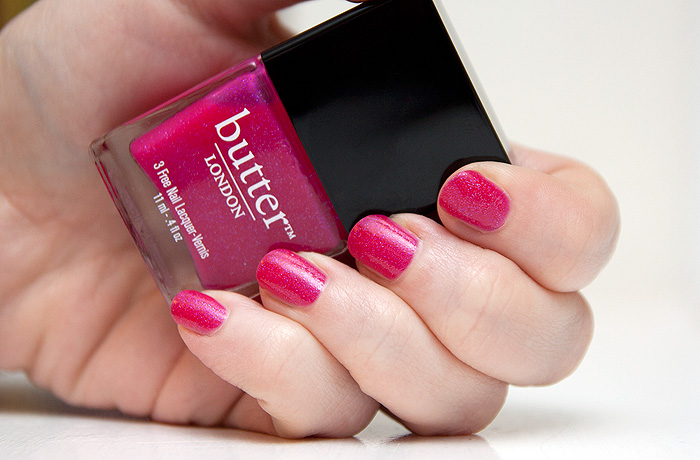
Continuing on the Spring/Summer Butter London parade is Disco Biscuit – a hot pink jelly with iridescent blue flashes courtesy of a sprinkling of micro-glitter.  This jelly finish is my favourite kind, soft and squishy without being too sheer – four coats gives enough coverage to please this opaque-loving polish fan.

Application wasn’t too taxing, a streaky first coat soon smoothed out with subsequent layers.  I really didn’t think I’d like this before applying it, some of the swatches I’d seen made me think I was going to have to put up with that slightly messy-looking finish that semi-sheer shades deliver but this builds beautifully to achieve just the look you want from super-sheer to fully opaque.  It would also make a beautiful layering shade if you’re keen for a little experimentation.

Butter London Disco Biscuit is available to buy online from PowderRooms, priced at £11.95

Skin Food Nail Vita VI407 Puppy Purple NOTD

Posted by Lipglossiping On March - 12 - 2012

My lovely friend Rowena from Cosmetic-Candy sent me a couple of Skin Food Nail Vita polishes last year and after falling in love with both of them (and not having swatched them yet, naughty!), I popped on eBay and picked up another that had caught my eye over on Witoxcity’s fabulous blog.

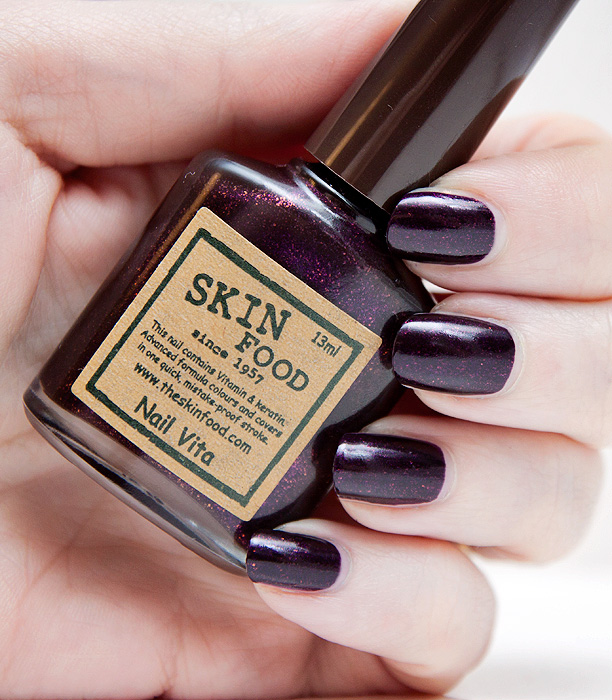
Puppy Purple is a beautiful, vampy shimmer – perhaps a little too vampy for March but I’m happy to break the rulez for this one.  It’s a little thick, though completely controllable and opaque in a single coat, although I did use two in the above photograph for the neatness value!  The shimmers in the creme base are striking and apparent on the nail, catching the light beautifully.  It’s not the most unique polish in the world but it’s one that I’m delighted to have in my collection and wouldn’t give up!

Perhaps the best thing about this polish?  I paid £3.49 for it, including shipping from South Korea.

You can buy Skin Food Nail Vita in Puppy Purple online from rubyruby76 on eBay.  Shipping was a little slow, but no major grumbles.

IMATS London 2012: Review and Photos

Posted by Lipglossiping On February - 7 - 2012

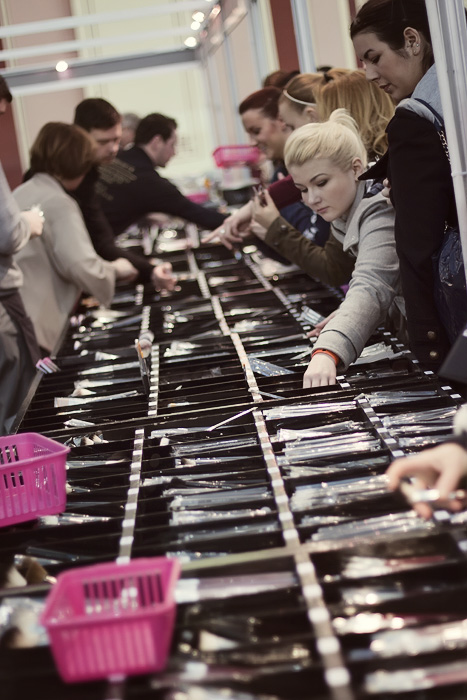
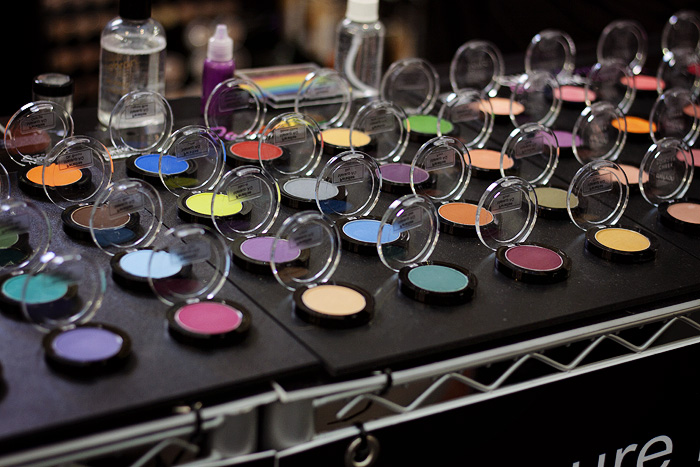
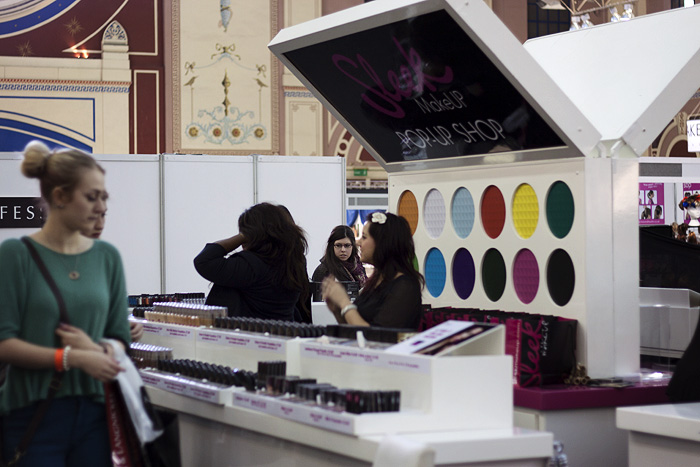
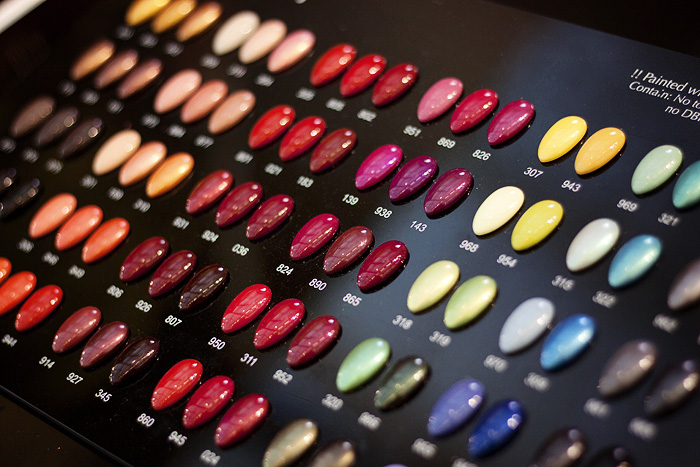
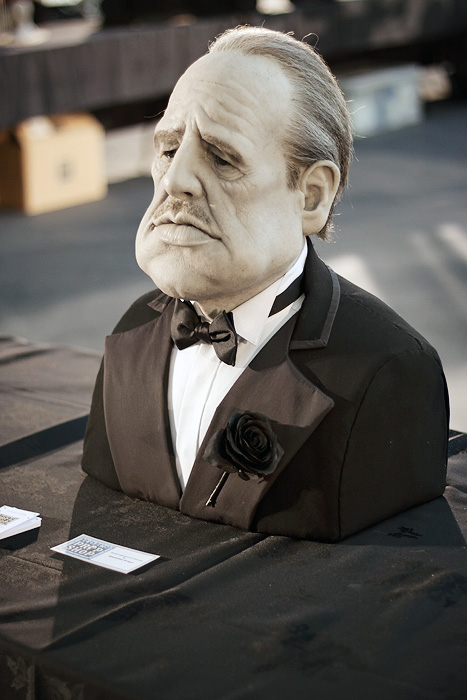
This was my 3rd year attending the International Makeup Artist Trade Show in London and it’s changed a lot over such a short period of time. The organisers have taken on board criticisms from shows past and worked hard to improve. The venue is now bigger since moving to the Great Hall at Alexandra Palace and consequently affords a lot more space when moving around.

I arrived at 8.30am on the Saturday morning, having dragged my under-eye bags from my (now practically traditional) el-cheapo Travelodge in Moorgate – the wind was biting my arse all the way from the bus stop to the front doors but thankfully it was toasty enough inside.  Unbeknown to me at the time, I was sitting opposite the lovely Iris from RougeDeluxe on my way up from Wood Green station on the W3 bus. When she told me she thought we’d been sharing the same bus, my natural reaction was to genuinely pray to the gods of self-image that I hadn’t been picking my nose/teeth/spots all the way up the hill.

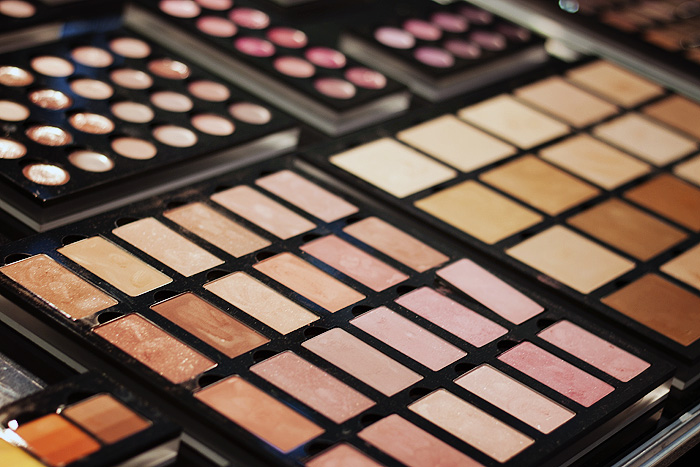
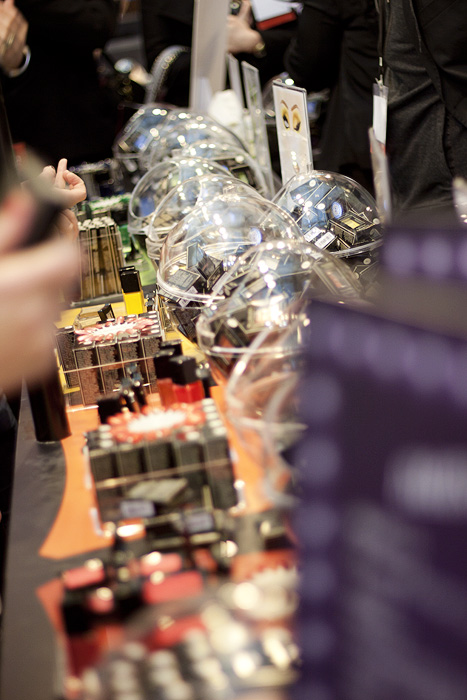
Such an early start was obviously for the best as the hall began to fill quickly.  Along with IMATS veterans: Leanne, Kim, and Laura we headed for the Crown Brush stand – always well stocked and packed once the crowds move in.  I umm-ed and ahh-ed for about five minutes before deciding that although I was loving some of the brushes… I just didn’t need another MAC 217 dupe you know?  And I headed off to my favourite IMATS haunt, the MUFE stand.  This year, it was bigger than ever… in-fact, I wrongly assumed that – as it was so well-stocked – it must have been being operated by MUFE themselves – but my till receipt shows that Guru Makeup Emporium were still behind the brand’s major appearance on the day.  PAM also held a (smaller) MUFE pitch and for once, offered the same 35% discount as their competitors at Guru.

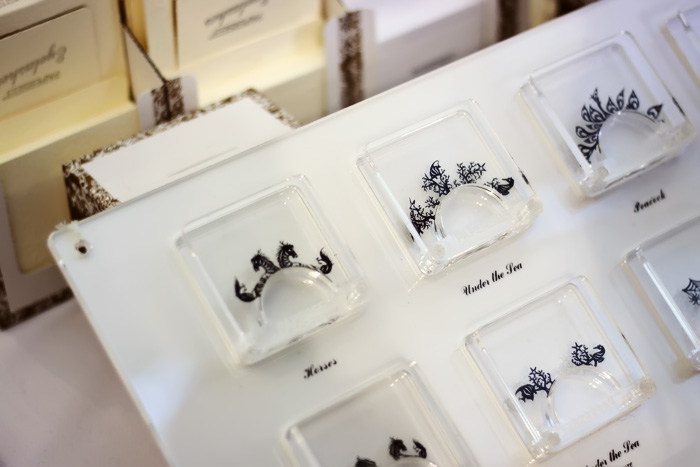
I always happily admit that I’m there for the shopping.  I’m not a MUA and have no desire to be one… I don’t wear false lashes, have no need for disposables or giant cases and as far as I’m concerned, latex and glitter is a combination best kept behind closed doors ifyouknowwhatimean.  This ultimately always means that the show will hold a limited interest to me (and quite rightly so, what with it being a TRADE show afterall).  I felt that this year, despite brands like Inglot and Sleek being in situ (which they weren’t two years ago) – it felt somehow less relevant to me than previously.  I was also disappointed not to see discounts from brands like Hakuhodo or Embryolisse.

I would have loved to see more of the U.S. brands represented either via their U.K. distributors or by themselves.  Brands like Sigma, Yaby, Ardell, Sugarpill, Stars Makeup Haven, Unii, honestly my list could go on…  I think there would be huge demand to see more and now that the show has moved into a larger venue – there’s certainly the floorspace to allow it.  Huge props to brands like OCC and Eve Pearl for making the trip over year after year and putting on a grand display, it was great to see their stands well-attended as a consequence.

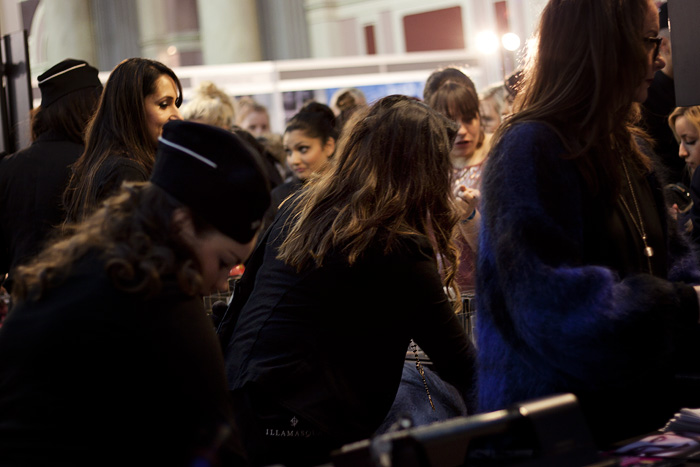
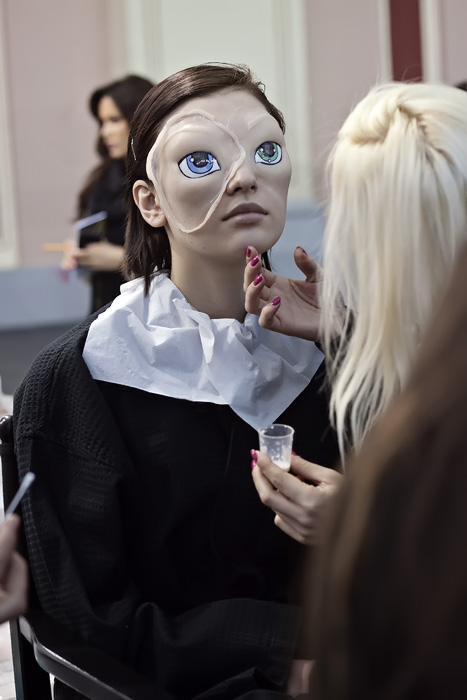
The body painting and artistry displays from the students were, as always, wonderful – though the ‘makeup museum’ looked a little barer than previous years and some of the exhibits were repetitions from previous shows.  I didn’t attend any of the keynote speaker’s talks or demonstrations simply because my timings didn’t allow it, although I have heard on the grapevine that the Embryolisse one was a hard-selling cringefest!  Some of the exhibitors also need to invest in bigger pitches.  Illamasqua were the worst culprits… occupying a ridiculously small footprint, combined with impressive discounts equals a recipe for a horribly frustrating shopping experience.

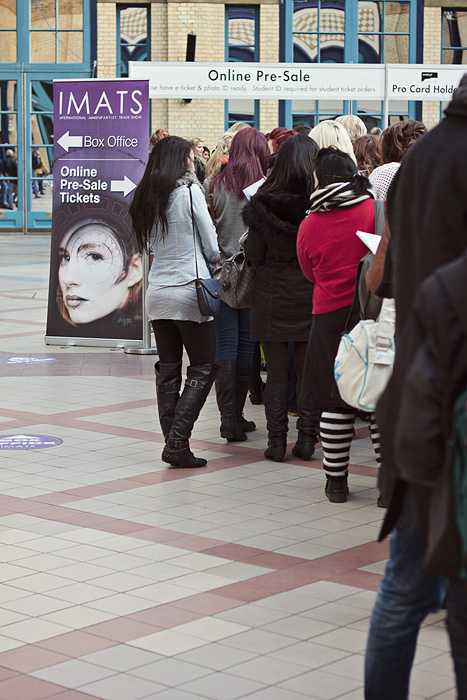
As the fortunate recipient of a press pass, it didn’t cost me a penny to attend but had I spent £40 for advance tickets or £60 at the door, I can’t honestly say that those (not insignificant) prices wouldn’t have given me greater frustrations at some of the issues I mentioned above.  Organisationally, the show seems to improve year upon year, with queues moving faster and plenty of staff on hand to point attendees in the right direction.  Refreshment facilities were plentiful, though the single ATM again displayed a queue of epic proportions.

I’ll show my (modest) haul very soon but thought I’d jot down some of my thoughts on the IMATS experience while it was still fresh.  I’m always a little torn on my trip to the annual extravaganza but this year really demonstrated the serious potential for more exhibitors now that the Make-Up Artist magazine produced show have ironed out those initial kinks with the venue space and slow-moving queues that plagued the shows of yesteryear.

Frankly, there remains to be nothing else quite like the IMATS in the UK.

…Featuring: Le Petit Jardin de Liloo

Posted by Lipglossiping On September - 2 - 2011

Ahh Liloo, mon petit chou-fleur (she likes it when I call her that).  I’m delighted to have this French-firecracker guest blogging for us today.  She’s the queen of Halloween, the high-priestess of Twitter and accelerates from nought to ‘passionate’ quicker that a Lamborghini super-charged Citroen. 

Today, she’s going to help us out with those pesky false lashes as she looks at the “8 reasons why you still can’t apply false lashes”.

So, grab a cup of tea, settle back, and read on as Lipglossiping.com features: LePetitJardindeLiloo

.

Bonjour, my name is Liloo and I am a recovering hopeless false lash wearer.  Throughout my life, I’ve been obsessed with many things: trying to find the perfect foundation which doesn’t break the bank, the best fake tan, achieving a dramatic cut crease… but nothing has possessed me as deeply as trying to apply false lashes.  I couldn’t tell you how many “how-to” youtube videos I’ve watched in frustration as the false lash appears to pop itself perfectly on the wearer’s upper lashline as if by voodoo!  How do they do it?  What am I doing wrong?

Patience is not one of my virtues, I’ve never been further than Green Hill on Sonic the Hedgehog and a scrambled Rubik’s Cube lasts about my 5 minutes before flying across the room.  But a few years on, I feel I’ve finally cracked it.  I feel I can now apply *some* false lashes confidently enough to seen in public.  But it’s been one heck of a tumultuous learning journey and I wanted to share some tips I have learnt along the way:

  1. Packet-ready: You expect the lash to fit straight from the packet

There is no way I would expect trousers I bought from the shop to fit my voluminous derriere and my short legs, without having to alter them.  Lashes are the same and I find myself having to trim the lashline on most lashes.  Make sure to measure the lashes before applying them and trim them accordingly, If in doubt, it’s better if they are too short, and you can always rely on some eyeliner to fake the little bit of lashline missing.  Went a bit mad with the scissors?  Again, not a problem as you can pretend they were corner lashes all along.  You bought full lashes and you want them to be noticeable but if they are sticking out too much on the outer corner, the eyelid will look heavy, as if it’s dragged down and the whole eye will look more closed off than before you started.  Placing it too close to the inner corner will bring a whole host of problems: 1) It will look unnatural, as your natural lashes only really start to be noticeable where the pupil starts, 2) you’ll struggle to make it stick without pinging out, 3) it will be very uncomfortable.

  1. Run: You want to run before you can walk

You want to make an impact and have chosen the most extravagant lashes to wear.  Dramatic, full fancy and elaborate lashes will need a thick lashline to support all the drama.  The more dramatic the lashes are, the thicker the lashline will be, and the more difficult they will be to apply and align just right on your lashline.  Don’t throw away your amazing lashes, keep them for later when you’ve gained a bit more confidence.  Aim to wear subtle effect lashes first and work your way up.

  1. Application Sequence: You apply false lashes after you’ve done your makeup.

This might be controversial but picture this: You’ve done the most amazing makeup ever. You’re so proud, you took 107 photos of it.  Are you really going to try 4 times to apply your false lashes, with glue all over the place and risking ruining your eyeshadow masterpiece?  No.  What you’ll end up doing is try to apply the lash just once and give up after that.  Why? Because while you removed the lash, the glue ripped some eyeshadow in the process, your perfect eyeliner smudged along the way.  You’re then left to try to fix your makeup, feeling worse off, wondering why you even bothered.

However, if you apply the lashes BEFORE any makeup, while you’re still trying to feet and learning, first you’ll have the best vision of your lashline and there will be no makeup to ruin. If there are pesky residues of glue in the process you won’t feel it so bad at trying to scrape it all off.  The obvious drawback is that the lash might have some eyeshadow fall out on it, so you’ll have to be extra careful at tapping the excess of eyeshadow beforehand.

  1. Cause it’s not you, it’s me

The lashes are rubbish, not you.  You bought lashes that are so poor quality, that even an experienced falsies wearer would not go near them because they don’t sit right.  The first pair of eyelashes I bought were NYC £1.99 lashes and a few years down the line, I now understand why I was struggling so much.  Once you take them out of their curvy support, the lash transforms itself into a straight fringe of hair. You’re forever trying to make it ‘marry’ the natural horizontal curve of your eye and whatever you do it’s pinging out, on the inside and outside corner of your eye.  Again, this might be a bit controversial, but even if you are beginner you need to invest in decent pair of eyelashes, it makes such a difference.  No need to spend a fortune, but aim to spend minimum of £5 and go and spend your pennies in a brand who specialises in lashes, like Eylure or Ardell if you’re outside England.  Unfortunately, there is no way of knowing before removing the lash from support if they’re going to all straight or retain their curvy shape, so you’ll have to rely on recommendations from people you trust.  Yes, I am sure you can find decent £1 lashes, but as a beginner you need all the help you can get and you need to the lash to do some of the work for you.

  1. Time

You’re not giving yourself enough time.  Not time in general (I gave myself years) but time on that day/evening before that special occasion where you want to wear your fluttery and dreamy lashes.  How long?  If you spend one hour to dry and style your hair, give yourself also 1 hour (you will inevitably be distracted) to apply your lashes, and aim to reduce progressively that as you grow more confident.  Eyelashes can make such a dramatic impact, I feel it’s totally worth spending the time.  If you like to include a little bit of spirit in your getting ready routine, I find it helps not to finish the bottle of vodka before applying my lashes.

  1. It’s not sticking properly

Not all glues are created equal.  Most glues which come with lashes are not very good, so stick to reputable brands such as Duo, Eylure and Ardell, which are totally resealable.  I’ve been wearing lashes for years, but I always like to carry a little bit of glue, in case. Call it my comfort blanket.

  1. Sit and Wait: Your timing is not right

There is nothing more irritating than following instructions to the letter and not getting it right.  You’ve counted 30 (Mississippi) seconds, you’re reading to tame the beast and introduce them to your lashline and it’s not working.  Apply the lash too soon, the glue will be too wet and the lash will end up everywhere but not on your lashline.  Wait too long, the glue is too dry, it will either not stick at all or you’ll be left with just one chance to get it perfect with no room to reposition it.  The best moment is when the glue is tacky.  “Tacky” is when the glue becomes almost transparent and when you touch it and it does small strings similar to melted cheese on a pizza, when you cut off a slice and the cheese trying to come off with it.

  1. Elp! You’re not using all the help available

Kids will start learning to ride a bike with stabilizers attached.  You can do the same for lashes.  Experienced false lash wearers will use a normal pair of tweezers or just their hand.  What if they made giant tweezers the same size as your lashline?  They do and it’s simply called a ‘false lash applicator’.  I found my stabilizers years ago from Japonesque, the best £7 I’ve ever spent.  Using the eyelash applicator made all the difference and, it was only then that I felt I had finally cracked it.  I am actually getting a little bit emotional reminiscing how happy it made me.  I can feel pretty now!

My lashes are so short, so straight.  Wearing false lashes gives me such a boost that it has become what I like the most about ‘makeup’.  The secret recipe for false application?  You’ve probably found it already, not very well hidden at the beginning of each paragraph 😉  When you’ve found it, do it, do it and do it again, like there’s no tomorrow.

You think you’ve ruined the lash after not getting it right for the first time? The lash can take it, it’s meant to be used and used and used again.  If the lash looks a bit bruised, that’s fine – it will help make it look more natural.  Keep at it, don’t give up, the rewards are worth it, I promise.

Happy false lashing xx

.

Thanks Liloo!  I’m gonna get some more practice in!  You’ve enabled that Japonesque lash placement tool straight into my shopping bag, looking forward to trying it!  False lashes were the one thing I wished I’d had the confidence to use when I went to that wedding last month.  I will get it eventually!
…Featuring: Eyeliner & Spraypaint

Posted by Lipglossiping On September - 1 - 2011

Robyn has been one of my weekly reads for many, many months.  The only blogger in existence who makes me want to wear yellow eyeshadow.  She makes me laugh, and she makes me want to grab my makeup and play.  It’s a killer combination.

I’m delighted to have her guest blogging an awesome and autumnal-inspired tutorial for us today.  Read on as Lipglossiping.com features:  EyelinerAndSpraypaint

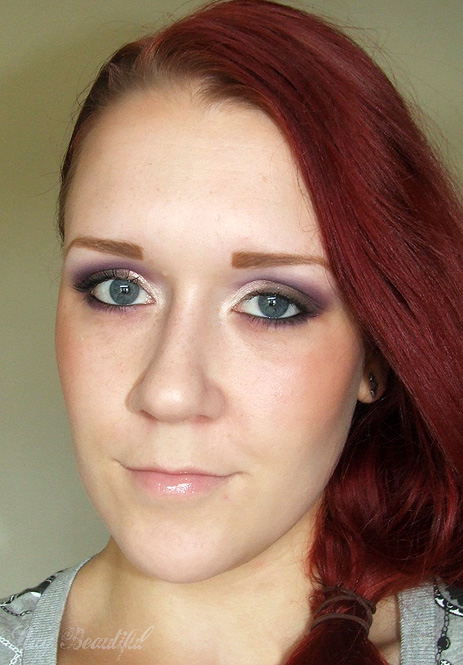
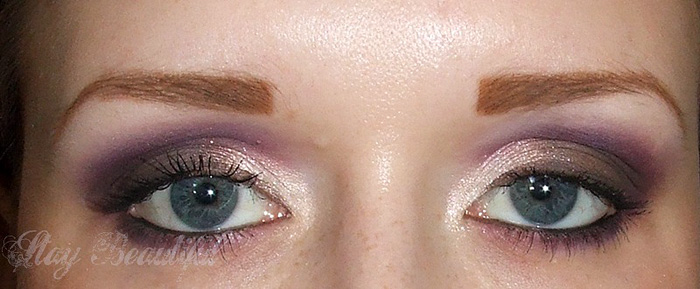
Hello, lovely Lipglossiping readers! I’m thrilled to be writing a guest post for you all, so I thought I’d knock together a little picture tutorial for this purple, chocolate and brown look.  I don’t always follow that you should use colours according to season, but this would be perfect for fall and it’d be very easy to switch up the colours in this look if you’d prefer something less smoky.

1. Prime your eyelids. I’ve used Urban Decay Primer potion all over the lid and then NYX Jumbo Eye Pencil in Milk sparingly over that, bringing it slightly up past my crease and blending well. Too much base in the crease area can grab your shadow and make it hard to blend.

2. Apply a bright white-gold on the inner third of your lid, and bring it into the inner corner of your eye.

3. On the rest of your lid, add a matte chocolate colour…

4. …and blend it in with the gold to get rid of that harsh edge. Using a flat shader brush, hold it vertically and make side-to-side motions. Add more of the gold if you need to.

5. Next, take a deep, slightly plummy matte purple and start to define your crease. Using a fluffy brush, I placed the shadow under the highest point of my brow and made small windshield-wiper motions. Go slowly and build up the colour – you can always add more but you can’t take it away without taking it off – and make sure you place your brush on the same spot on each eye to make it even. Repeat until you’ve got your desired depth of colour.

6. Then, using windshield-wiper motions again, blend the crease colour down toward the inner corner of your eye. Make this a little less intense than in step 5 so there’s a slight gradient.

7. Taking the same purple on a pencil brush, line your lower lashline, making sure to join it up with the crease colour.

8. Taking a deeper brown on an angled brush, line your upper lashline, the outer half of your lower lashline and darken the outer crease slightly with the same colour using a fluffy brush. You could  use a black shadow if you wanted a more dramatic effect.

9. Line your waterline with a black (or deep brown) pencil and tightline your upper lashes if you want. If your liner tends not to last very well on your waterline, set it with a touch of matte black (or brown) shadow.

10. Taking a fluffy paddle brush, highlight under your brow and blend any harsh edges in your crease colour and your outer corner. I chose a matte cream shadow, but if you want more drama or sparkle, you could go in lightly with the same shimmery gold we used earlier.

11. Add mascara and brows (and falsies if you want!) and your eyes are done!  Hooray!

Products used:

Eyes: Gold – Mornings of Gold by Hi Fi Cosmetics. Chocolate brown, Inglot matte 357. Purple from Wet & Wild Lust palette. Deeper brown, Inglot Matte 326. Liner, Benefit Bad Gal waterproof liner in Black, set with Sleek black eyeshadow. Highlight, Inglot matte 351. Mascara, Maybelline One By One. Eyebrow pencil, Rimmel Professional Eyebrow Pencil in Hazel.

Lips: Nameless L.E Barry M Lipgloss Wand

Face: Inglot Cream Foundation in 21, Darling Girl blush in Aloha

.

To finish the look, I added a soft matte bronzer and a pinky-nude gloss. I hope you ladies enjoyed the tutorial, please let me know how you got on if you try it out!


Thanks Robyn! It looks lovely and you know, they say that purple suits EVERY skintone and eye colour. The ultimate universal shade!

…Featuring: Beauty’s Bad Habit

Posted by Lipglossiping On August - 30 - 2011

Lily is a 19 year old beauty blogger hailing from one of my favourite UK cities, Manchester.  She has a penchant for indie cosmetics, inspiring looks and creating inventive ways to store your makeup!

Since first stumbling across Lily’s blog, I’ve been transfixed by her tutorials – she has the kind of creativity I could only dream of aspiring to.  Don’t believe me?  Read on as Lipglossiping.com features:  BeautysBadHabit

.

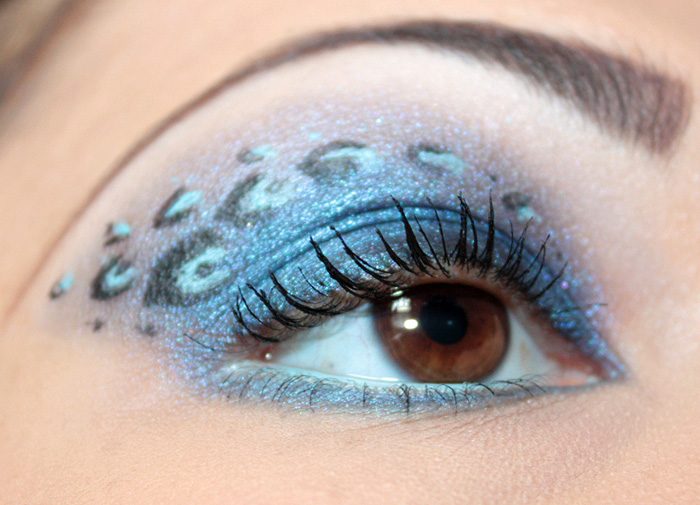
Take some black eyeliner, a leopard and an electric guitar, blend them together and what do you get? A freakin’ rock ‘n’ roll smokey eye, that’s what!  Or a really big mess…try explaining that one away to your insurance company.

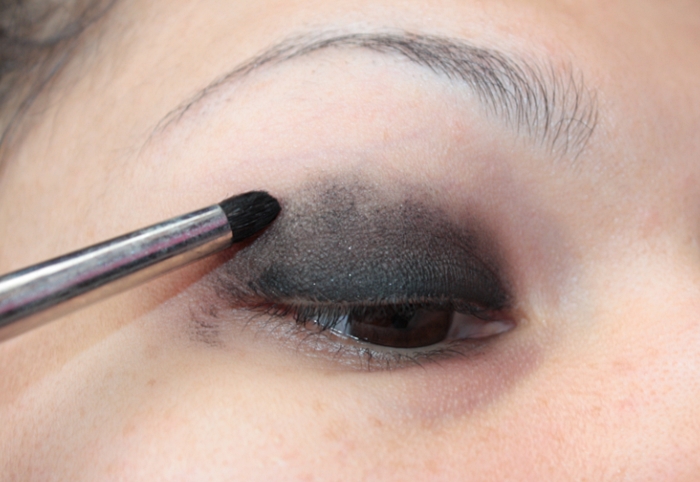
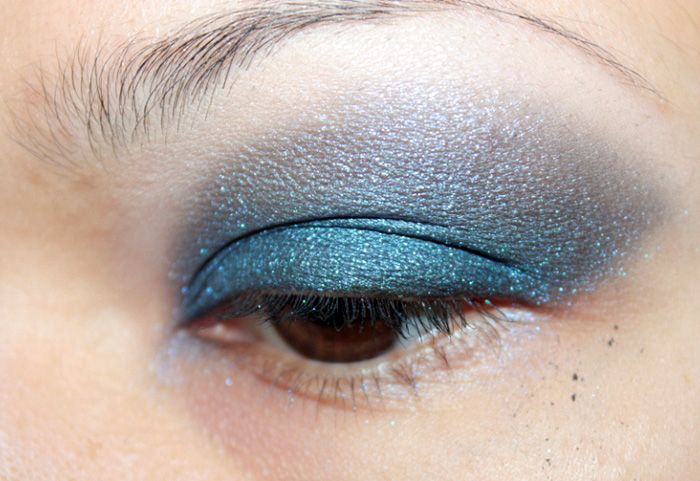
1. Apply your eyeshadow primer as usual.  Cover your entire lid with a soft, black eyeliner and blend upwards just a tiny bit past the crease.  Don’t worry if it’s patchy, it will be covered up soon!

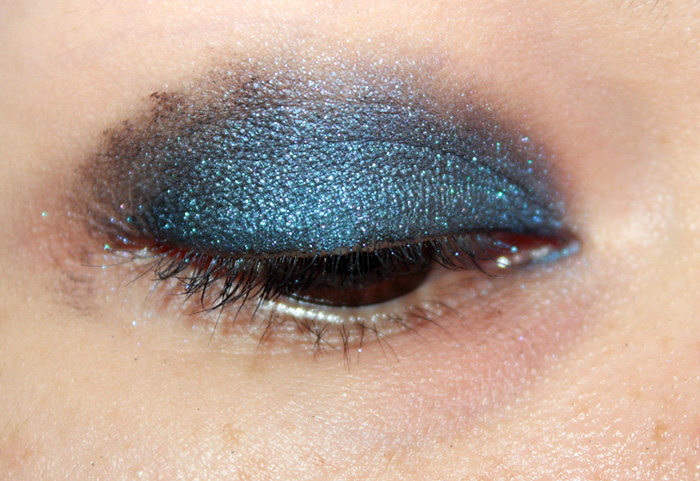
2. Pat a deep, shimmery eyeshadow over the black.  You can use any colour you fancy, purples and golden browns look great with this look, too.

3. Now apply a matte highlight colour downwards from directly beneath the eyebrow.  Applying the highlight colour first makes it easier to blend past the crease in the next step…

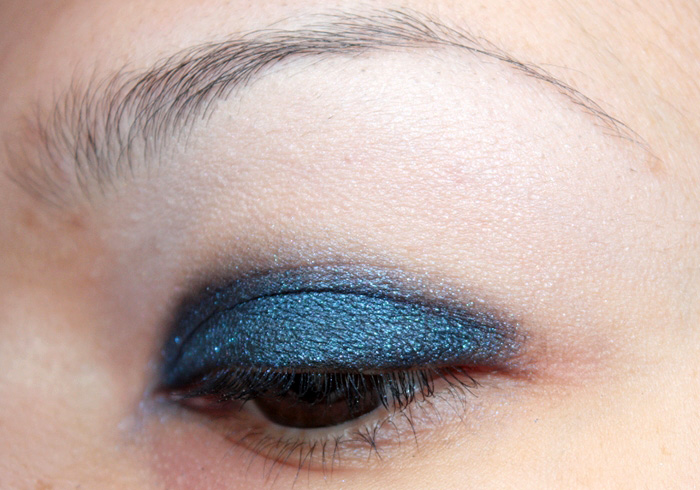
4. Use the same deep, shimmery colour on the lid to extend the eyeshadow shape upwards past the crease.  If you’re unsure of how to shape your eyeshadow, use your eyebrow shape as a guide.  If you don’t want to add leopard print to your look, skip to step seven.

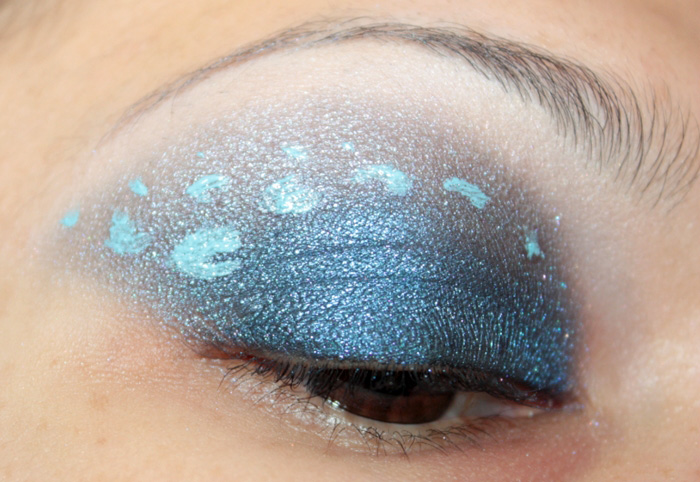
5. Squiggle some pale coloured dots, dashes and ‘C’ shapes above your crease.  Apply more at the outer edge and use fewer as you near the centre of your face.  I’ve used eyeshadow mixing with Illamasqua sealing gel, but coloured liquid eyeliners are definitely an easier option!

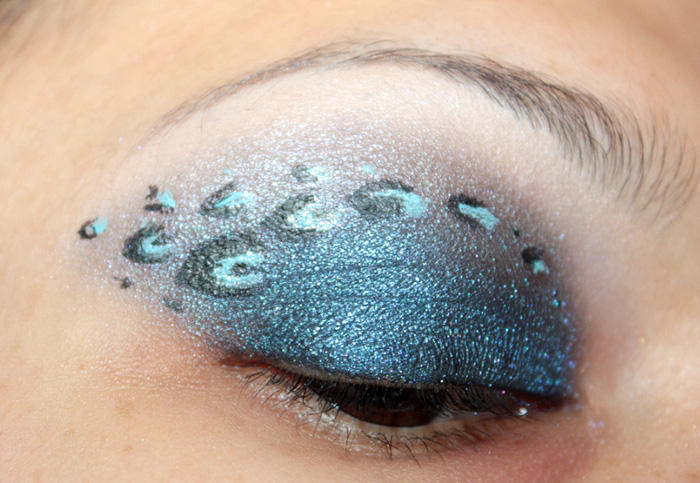
6. Outline your dots and dashes at the outer edges. You don’t have to be neat or even – how uniform are a leopards spots, after all?!

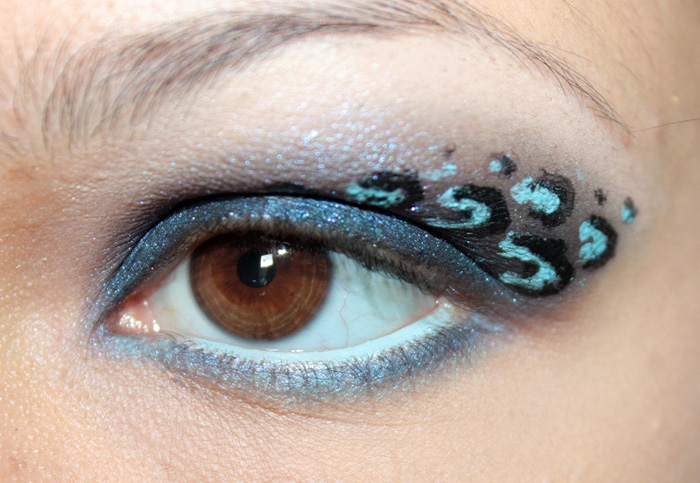
7. Extend the eyeshadow all the way around the eye.  Apply eyeliner to the waterline – I used a white and pressed the same pale blue eyeshadow I used for the dots over the top.  You could always use the usual black, though!


8. Apply mascara or false lashes and fill in your eyebrows.  If you decide to use falsies, opt for ones which aren’t very long, otherwise they will cover your leopard design up!

9. Bask in the glory of your awesome eye makeup 🙂

I finished off this look with peachy pink blush and a pink toned nude lipstick for a balanced and fresh finish. I’m not listing the exact products I used throughout since they’re not especially unique, you can pick up similar shades from any make-up company!

.

See what I mean about the talent?  Fiendishly awesome, thanks Lily!!

…Featuring The 6 Inch Stilettos

Posted by Lipglossiping On August - 29 - 2011

Amrita is a doll, her bubbly and infectious sense of humour keeps me smiling on Twitter, whilst her impeccable taste in cosmetics often has me lusting after her most recent acquisitions!  Not sure?  Check out her storage post for a sneak peek at her ‘cheek’ drawer!

I’m thrilled that she agreed to guest blog for us today, so without further ado, read on as Lipglossiping.com features: The6InchStilettos

.

Seeing as my Top 10 series has been so popular, I figured that I should do a Top 10 feature on my makeup brushes too. Now, I own a hell of a lot of makeup brushes and although some of them are unloved, I try to rotate them and use them at least once or twice.

A lot of conversations on Twitter amongst beauty bloggers and general girly chit chat revolves around makeup brushes and which ones are the best to buy but it always comes down to personal preference. Some like firm brushes while others prefer super soft ones, others think that expensive brushes are best while others feel that high street versions are way better – It’s all personal.

Anyway, I’m waffling on way too much so let’s get cracking!

These are my most used and most loved makeup brushes…

Unknowingly, it turns out that I have 5 main face brushes and 5 main eye brushes which I definitely didn’t plan but I guess it all works out in the end.

So, the face brushes…

From left to right:
Bobbi Brown Blush Brush
Bobbi Brown Powder Brush
Crown Brush Stippling Brush
Crown Brush Flat Top Kabuki Brush
Inika Cosmetics Kabuki Brush

Now, the eye brushes…


From left to right:
Bobbi Brown Eye Blender Brush – Very similar to MAC 224 but with longer bristles
Inglot 6SS Blending Brush – Another one that is very similar to MAC 224 but slightly wider
Bobbi Brown Ultra Fine Eye Liner Brush
Boots Eyeshadow Brush – Probably my favourite eye makeup brush EVER
Crown Brush Eyeshadow Brush

I have loads of Bobbi Brown makeup brushes in my collection purely because I used to work for them but even if I hadn’t, I definitely would have invested the money. They don’t shed and they’re made so well that you can’t go wrong with them – Plus, each brush is already labelled so even someone with no existing knowledge of makeup brushes can use them with ease.

Other brands of makeup brushes that I use include: MAC, Royal & Langnickel, The Body Shop and Essence of Beauty. The next brushes on my list are Sigma makeup brushes so I might have to wait until pay day to splash out on a full set of those!

What are your favourite makeup brushes or the ones that never let you down?

Make sure you drop a comment in the box or whizz over to my blog and let me know over there!

Until next time…
Keep swivelling those hips in your


Thanks Amrita!  I need to check out some of those Bobbi Brown brushes for sure!

Random Acts of Beauty… Coming to a town near you?

Posted by Lipglossiping On August - 13 - 2011

Fancy the chance to bag some free makeup and tips from a top Celebrity Make Up Artist this September?

Keep reading (and watching!) ‘cos mineral makeup brand Sheer Cover will be touring the UK on a beauty-fueled road trip next month, dishing out free beauty gifts, mini makeovers and advice wherever they go!

Watch the video below for more information…

If you want to get involved with the fun and claim your stake in a Random Act of Beauty, follow the Sheer Cover twitter feed @beautinews, foursquare  or www.sheercover.co.uk to find out when they’ll be visiting a town or city near you!

RANDOM

Amie Bright Eyes - Very Gentle Eye Makeup Remover

Fancy the chance to bag some free makeup and tips from a top Celebrity Make Up Artist this September? Keep reading (and watching!) ‘cos mineral …

Bronzing Translucents... It's bronzing but not as you know it!

Fancy the chance to bag some free makeup and tips from a top Celebrity Make Up Artist this September? Keep reading (and watching!) ‘cos mineral …

WIN: A set of Boots 17 MAGNETIC Nail Polishes!

Fancy the chance to bag some free makeup and tips from a top Celebrity Make Up Artist this September? Keep reading (and watching!) ‘cos mineral …

Say goodbye to gambling, everyone's a winner with the Liberty Beauty Lottery.

Fancy the chance to bag some free makeup and tips from a top Celebrity Make Up Artist this September? Keep reading (and watching!) ‘cos mineral …

Vaseline Creme Brulee Giveaway Winners…

Fancy the chance to bag some free makeup and tips from a top Celebrity Make Up Artist this September? Keep reading (and watching!) ‘cos mineral …

Inexpensive Beauty Find: Poundland Dry Shampoo (Intu Style)

Fancy the chance to bag some free makeup and tips from a top Celebrity Make Up Artist this September? Keep reading (and watching!) ‘cos mineral …

The Lipstick League - Week of 22.04.13

Fancy the chance to bag some free makeup and tips from a top Celebrity Make Up Artist this September? Keep reading (and watching!) ‘cos mineral …

NARS Pure Matte Lipstick launches at Selfridges

Fancy the chance to bag some free makeup and tips from a top Celebrity Make Up Artist this September? Keep reading (and watching!) ‘cos mineral …

The Body Shop NEW Colour Crush Eyeshadows (swatches galore!)

Fancy the chance to bag some free makeup and tips from a top Celebrity Make Up Artist this September? Keep reading (and watching!) ‘cos mineral …

Save £5 on Ruby and Millie at Boots!

Fancy the chance to bag some free makeup and tips from a top Celebrity Make Up Artist this September? Keep reading (and watching!) ‘cos mineral …

POPULAR

CLOSED: Competition Time: Givenchy Very Irresistible L'eau en Rose Perfume!

Fancy the chance to bag some free makeup and tips from a top Celebrity Make Up Artist this September? Keep reading (and watching!) ‘cos mineral …

CLOSED - Win it! The Body Shop Expert Brush Collection

Fancy the chance to bag some free makeup and tips from a top Celebrity Make Up Artist this September? Keep reading (and watching!) ‘cos mineral …

Win a gorgeous "glow" trio with prizes from Urban Decay, New CID, & Arbonne!

Fancy the chance to bag some free makeup and tips from a top Celebrity Make Up Artist this September? Keep reading (and watching!) ‘cos mineral …

Hello? Is this thing on?

Fancy the chance to bag some free makeup and tips from a top Celebrity Make Up Artist this September? Keep reading (and watching!) ‘cos mineral …

Avoid the brush off with Oral-B Pro-Expert

Fancy the chance to bag some free makeup and tips from a top Celebrity Make Up Artist this September? Keep reading (and watching!) ‘cos mineral …

Big savings on French Pharmacy brands, win my Escentual.com top picks!

Fancy the chance to bag some free makeup and tips from a top Celebrity Make Up Artist this September? Keep reading (and watching!) ‘cos mineral …

Win it! 3 EcoTools Bamboo Bronzer Brushes to win!

Fancy the chance to bag some free makeup and tips from a top Celebrity Make Up Artist this September? Keep reading (and watching!) ‘cos mineral …

FOTD Busting out of the comfort zone!

Fancy the chance to bag some free makeup and tips from a top Celebrity Make Up Artist this September? Keep reading (and watching!) ‘cos mineral …

Dear Obesity...

Fancy the chance to bag some free makeup and tips from a top Celebrity Make Up Artist this September? Keep reading (and watching!) ‘cos mineral …

Urban Decay The Black Palette - Photos & Swatches

Fancy the chance to bag some free makeup and tips from a top Celebrity Make Up Artist this September? Keep reading (and watching!) ‘cos mineral …

COMMENTS

  • Categories

  • Archives

  • Admin

  • Ads