Food Friday (yes, I know it’s Saturday): Apple Pie

Posted by Lipglossiping On October - 8 - 2011

I know, I know… I should save it for next week right?  But I have a week of baking ahead of me and if I do that, I’ll have forgotten about the Apple Pie that I made this evening.  I love Apple Pie but it’s strictly off limits for me at the moment.  Poor Mr L had a particularly nasty dentist encounter on Thursday so I thought I’d cheer him up with his absolute favouritest treat in the world.
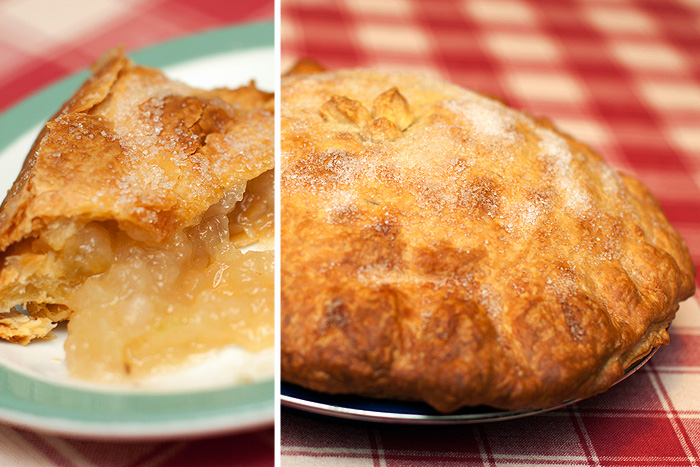
First of all, I need to tell you.  Forget about the pastry, it’s not even mine.  My Mum brought me back some ready-made French pastry rolls in the Summer and they’ve been sitting in the freezer ever since.  Yes, they were puff – I know, I’ve broken about a billion Apple Pie rules already but I don’t like waste and I couldn’t be bothered to make my own tough, not-very-nice shortcrust at gone 11pm at night.

Anyway, if you can’t be bothered either, you can buy ready rolled pastry sheets too, shortcrust or puff.  Don’t let anyone judge you.

Anyway, do you want to know the secret to making awesome pies?  It’s this.  An enamel plate.  All my pies are made on these things – apple, meat, cheese and potato… you name it, it’s been made on an enamel plate.  They cost around £2.00 and my favourite ones are made by a company called Gelert.  You need one, trust me – no more soggy bottoms.

Anyway, the Apple Pie you see in that there picture up there, goes a little something like this.

Apple Pie

4 Large Cooking Apples (eaters won’t do)
140g Sugar (whatever you’ve got, except obviously icing)
1tsp Ground Ginger (can use Cinnamon if you prefer to be a purist)
1 large handful of Sultanas

2 sheets of ready-rolled Pastry (unless you’re clever and make your own)
1 Tbsp Sugar for sprinkling

1.  Preheat your (fan) oven to 170 degrees celsius

2. Peel and core the apples before dicing them into 1/2″ square cubes.

3. Over a low heat, gently stew the apples, sugar, ginger and sultanas until the apples are just tender and you’ve created a rich, thick syrup from the sugar.  Combine well.

4. Grease and flour your pie plate to prevent sticking and lay down your first sheet of pastry into the plate, pressing gently with your knuckle to ensure there are no gaps between the plate and your pie base.

5.  Using a slotted spoon, transfer the apple mixture into your pie plate, you won’t want to use all the syrup.

6. Gently lay your top pastry sheet over the plate and fold the edges of the top pastry layer under the bottom layer and press gently into the plate edge to seal.  If you don’t like a thick crust, you can trim the edges before doing this.

7. Poke a few air vents into the top of the pie with a fork and sprinkle with sugar before placing in the oven and baking for around 40 minutes.

Enjoy!


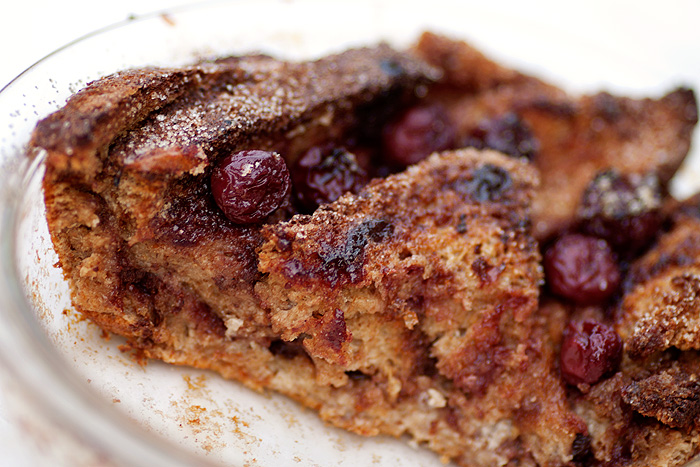
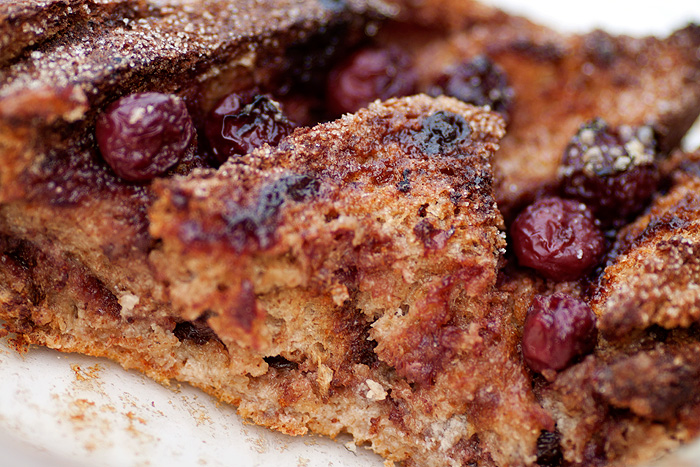
Food Friday: Luxury Bread & Butter Pudding with Cherries

Posted by Lipglossiping On September - 30 - 2011

There’s something so comforting about a hefty pudding.  Treacle sponges, chocolate mud cakes and bread & butter pudding all carry a certain amount of stodge with them and quite frankly, they beat the living crap out of anything light and wispy.  Except meringues, but let’s be honest… meringues are in a league of their own.

I use wholemeal bread in my Bread & Butter Pudding for no other reason than because that’s what I buy anyway.  The addition of jam and a few cherries turns this home-cooked favourite into a slightly more extravagant pud.

Luxury Bread & Butter Pudding

8 slices of bread (any kind with crusts left on)
Morello Cherry Jam (or whatever you’ve got if you’re not fussy!)
Butter

2 eggs, beaten
425ml milk
Large handful of cherries (I buy mine in a big jar from Lidl)

1 tbsp brown sugar for sprinkling

1. Butter the bread before spreading a layer of jam over each piece and cutting into triangles.

2. Grease your cooking dish well and build up the layers of bread, interspersing with cherries as you go.

3. Repeat until you run out of bread and cherries!

4. Combine the beaten egg and milk before pouring over the bread and allow to soak for a couple of minutes.

5. Sprinkle the top with brown sugar and pop in a preheated oven at 180c and bake until golden brown (around 30/35 minutes)

.

Such a simple and inexpensive pudding with a billion possible variations.  Try spreading the bread with Nutella instead of jam or throw in a handful of raisins alongside a generous glug of rum!  Adjust the quantities of egg and milk depending on how much custard you like or change up the bread to substitute plain old loaves with Brioche, Croissants or Panetone!  The possibilities are really quite limitless.

Do you have a favourite Bread & Butter Pudding recipe?  I foresee more of these on the menu as Winter draws nearer.

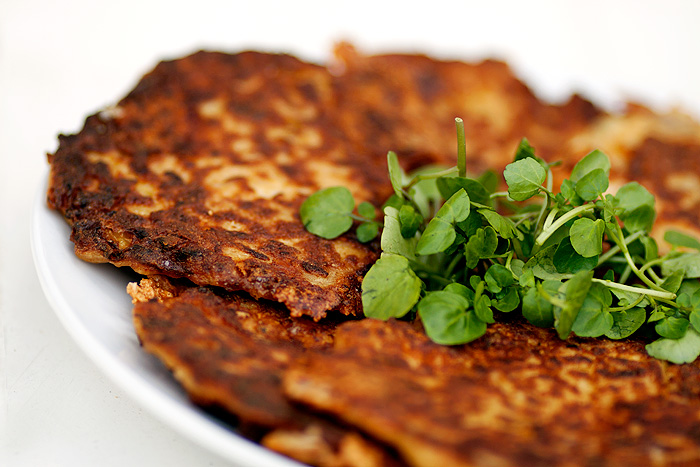
Cauliflower Fritters with Mozzarella

Posted by Lipglossiping On September - 16 - 2011

I bought another cauliflower this week in an attempt to get a new recipe under my belt in preparation for coming off the diet and back onto normal food.  I’ll be going the low-carb route, not the Atkins route or anything as hardcore as that, I’ll just be avoiding the “shovel as much starch, bread, pasta and rice into my mouth as possible” route.

Amanda from Beauty Blogging Blonde mentioned that she was making Cauliflower Fritters last week on Twitter and that was pretty much all the encouragement I needed.  She did send me a link to the recipe she was using but I’ve lost it, so ended up bodging something together from a few recipes I’d googled and whatever I had in the cupboards.

I need a posher name than ‘fritters’ really because ‘fritters’ rhymes with ‘squitters’ and where food is concerned, those two words should never be seen in the same sentence.

Cauliflower Fritters

1 head of Cauliflower
1 Onion, diced
2 cloves of Garlic, crushed

1 tsp Paprika
1 tsp Salt
1 tsp Black Pepper
1 tbsp Parmesan Cheese (don’t judge me, I only had dried)

3 eggs, beaten
3 tbsp plain/wholemeal flour (more if needed)

200g Mozzarella, cubed

1 tbsp oil for frying

1).  Steam the Cauliflower until tender.  I do this in a cellophane-covered bowl in the microwave with a couple of tbsp of water in the bottom.  Takes around 10 minutes of cooking time on full power.

2).  Once tender, mash the cauliflower and add the diced onion, garlic and other dry ingredients.

3).  Combine the mixture with a fork before incorporating the beaten egg.

4).  Add the flour 1 tbsp at a time, mixing well until you get a firm consistency.  You want the mixture to hold together on a spoon (just about).  You may need more or less flour depending on how large your eggs are!

5).  Add the Mozzarella and incorporate gently.

6).  Heat the oil in a frying pan on a low/medium heat.  The worst thing you can do is have your heat too high.  We need to cook the flour which means not burning the outsides!  Start low and turn the heat up as you get used to the cooking times needed.

7).  Once your oil is hot, spoon the mixture into the pan in little patties and press down lightly to shape.

8).  Leave frying (don’t be tempted to turn or peek) for a good 3/4 minutes.  If you smell burning, ignore that last instruction and remember to keep the heat LOW.

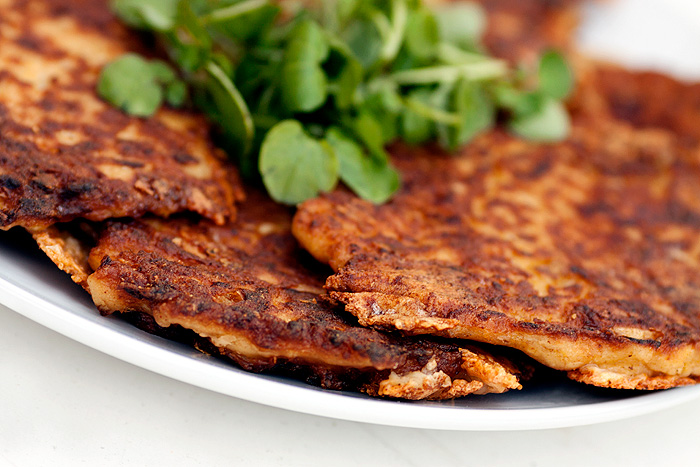
9).  Turn and cook the fritter for the same time on the other side.  You’re looking for a dark golden brown and a crispy texture – the insides will be soft with melty Mozzarella.

10).  Drain on a piece of kitchen towel and serve as a side or on their own with a salsa and salad.

.

These cauliflower fritters are ridiculously delicious and even Leila was impressed enough to attempt one.  They’re ideal eaten freshly cooked but lovely cold too (they go a bit chewy).  Best reheated from frozen in a v. hot oven.

Share your favourite cauliflower recipes with me!

Cauliflower Cheese with Bacon, the lazy girl’s way

Posted by Lipglossiping On September - 2 - 2011

Poor cauliflower, the most misunderstood vegetable of all.  I think they’re amazing and I’m not just saying that because today’s recipe features them heavily.  I hated cauliflower when I was growing up.  My Mum used to serve it as an after-thought, anaemic and boiled to death.

It’s actually pretty versatile and makes a great base for many dishes.  As a frequent low-carber, it’s saved my backside numerous times, making a fairly convincing substitute for fried rice (grated) and pizza dough!

But in more regular, daily use, the cauliflower is at its best when combined with cheese and bacon.  Mmmm, bacon.  When I make Cauliflower Cheese, I make a big’un as it keeps very well in the fridge, you may want to half the quantities or just live off it for a week like we usually do.

Cauliflower Cheese

1 large head of Cauliflower
3 Carrots, sliced
1 Onion, diced
350g mature English Cheddar, cut into chunks (go on, use the whole packet – I won’t tell anyone)
1 pack of Bacon Lardons/Mis-shapes/Leftover Ham (whatever you’ve got, this dish will take it nicely)

2 tins of Evaporated Milk
1 tsp Mustard
1 tsp Nutmeg (freshly grated if you can be arsed)

2 slices of Bread, made into breadcrumbs (or you can use crackers for a different kind of crunch)
50g mature English Cheddar, grated
2 Tomatoes for decoration

Preheat the oven to 180 degrees Celsius

1).  Break the cauliflower into florets trying to keep them reasonably large in size and place them in glass bowl with a few tbsp of water in the bottom.  Cover with a vented lid (clingfilm with holes poked through or microwave cover) and pop in the microwave for around 6 minutes until just tender (test with a fork).  You could of course boil or steam in a traditional steamer… but I’m being lazy remember.

2).  Cook the carrots with the same method and just check occasionally with a fork until they’re *just* tender.

3).  Fry the onion and bacon until crispy and set aside.

4).  Using a food processor, blitz the cheese, mustard, nutmeg and evaporated milk together.

5).  Grab a large ovenware dish (no need to grease it), and add the cauli, carrots, fried onion and bacon.

6).  Pour over the faux cheese sauce.

7).  Scatter the breadcrumbs and grated cheese before layering the sliced tomatoes ‘prettily’ on top.

8).  Bake in the oven at 180 degrees Celsius for around 25 minutes, or forget about it and remember after 35 minutes to get it a bit burnt around the edges like mine.

Personally, I slightly prefer my Cauliflower Cheese with a proper roux base.  Mr. L prefers it this way.  L doesn’t care as-long as she gets more bacon bits than anyone else.

Lazy Cauliflower Cheese without the efforts of a homemade cheese sauce.  Bliss.

It’s a rhubarb revival!

Posted by Lipglossiping On February - 27 - 2011

Weekends were made for slovenliness – the respite before the manic new week ahead.  I use the time to treat my skin to a bit of makeup-free pampering, I also like to spoil the family with a treat or two…

Yesterday was all about the rhubarb!

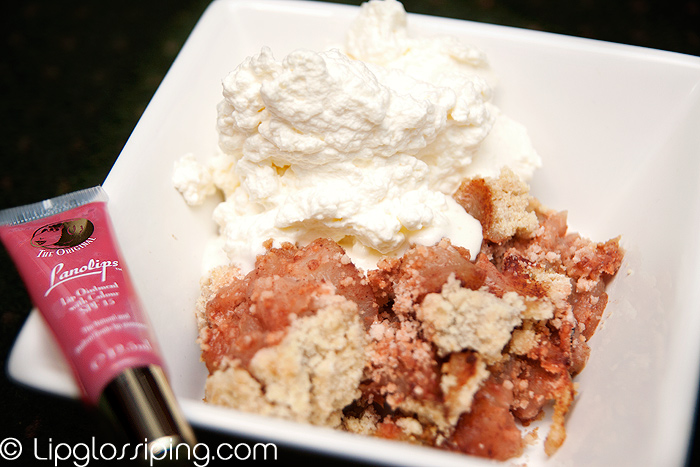
Seeing as I’m still on my diet (but getting there slowly!), I had to gaze at the crumble from a distance.  Check out the whipped cream/crumble ratio… that’s how we roll around these here parts.

Not *quite* as delicious but tasty nonetheless is Lanolips Rhubarb Lip Ointment… a sheer, moisturising balm with a hint of colour and sparkle.

The more I’m getting into wearing strong lip colours, the less use I have for these sheer coloured tubes.  I apply my Lanolips 101 before bed at night anyway so don’t need the daytime moisturisation these provide.  But if you’re more of a natural lip girl, these are definitely worth checking out.

My favourites from the coloured range are: Rhubarb, Apples and Dark Honey but definitely check out Sunshine too if you like warmer colours.

[stextbox id=”alert” caption=”And for the crumble?” ccolor=”ffffff” bcolor=”b0c4de” bgcolor=”e6e6fa” cbgcolor=”b0c4de”]

♦ 1 large tin of rhubarb (unless fresh is in season!)
Brown Sugar to taste depending on how tart you like it! (I use about 2 tbsp sprinkled over the rhubarb and 1 over the top of the crumble before baking)
♦ Ready made crumble topping (what? it *is* the weekend!)
♦ 1 tsp of ground cinammon
♦ 1 1/2 tsp of mixed spice

That’s it!

Drain the rhubarb and lay in an ovenproof dish ♦ Add a sprinkle of brown sugar and the spices ♦ Cover with the crumble topping and press down to compact with your fingers (or back of a spoon if you’re a hygiene freak!) ♦ Sprinkle the remaining brown sugar ontop and lightly scratch the surface with a fork to ‘rough’ it up a bit!

Put it in a pre-heated oven (200°c) for 40-45 minutes and pray to the Gods of crispiness that yours comes out with a crunchy top!

Serve with cream or custard… I nearly always use whipping cream just ‘cos that’s how my Nan done did it!

[/stextbox]


Lanolips Lip Ointment in Rhubarb with SPF15 is priced at £7.99 and available online from Victoria Health or instore at Boots.

RANDOM

SpaRitual – It’s Raining Men NOTD

Weekends were made for slovenliness – the respite before the manic new week ahead.  I use the time to treat my skin to a bit …

Jemma Kidd Pro Lip Perfector

Weekends were made for slovenliness – the respite before the manic new week ahead.  I use the time to treat my skin to a bit …

Issey Miyake Pleats Please Perfume Review

Weekends were made for slovenliness – the respite before the manic new week ahead.  I use the time to treat my skin to a bit …

The Lipstick League - week of 28.7.14

Weekends were made for slovenliness – the respite before the manic new week ahead.  I use the time to treat my skin to a bit …

Win it! Rio Airbrush Nails Kit

Weekends were made for slovenliness – the respite before the manic new week ahead.  I use the time to treat my skin to a bit …

Still resisting Barielle?

Weekends were made for slovenliness – the respite before the manic new week ahead.  I use the time to treat my skin to a bit …

Flash Blog Sale

Weekends were made for slovenliness – the respite before the manic new week ahead.  I use the time to treat my skin to a bit …

Clarins Colour Accents Face and Blush Powder

Weekends were made for slovenliness – the respite before the manic new week ahead.  I use the time to treat my skin to a bit …

Don't miss another post!

Weekends were made for slovenliness – the respite before the manic new week ahead.  I use the time to treat my skin to a bit …

By Terry Graphic Wave Collection - Summer 2010

Weekends were made for slovenliness – the respite before the manic new week ahead.  I use the time to treat my skin to a bit …

POPULAR

CLOSED: Competition Time: Givenchy Very Irresistible L'eau en Rose Perfume!

Weekends were made for slovenliness – the respite before the manic new week ahead.  I use the time to treat my skin to a bit …

CLOSED - Win it! The Body Shop Expert Brush Collection

Weekends were made for slovenliness – the respite before the manic new week ahead.  I use the time to treat my skin to a bit …

Win a gorgeous "glow" trio with prizes from Urban Decay, New CID, & Arbonne!

Weekends were made for slovenliness – the respite before the manic new week ahead.  I use the time to treat my skin to a bit …

Hello? Is this thing on?

Weekends were made for slovenliness – the respite before the manic new week ahead.  I use the time to treat my skin to a bit …

Avoid the brush off with Oral-B Pro-Expert

Weekends were made for slovenliness – the respite before the manic new week ahead.  I use the time to treat my skin to a bit …

Big savings on French Pharmacy brands, win my Escentual.com top picks!

Weekends were made for slovenliness – the respite before the manic new week ahead.  I use the time to treat my skin to a bit …

Win it! 3 EcoTools Bamboo Bronzer Brushes to win!

Weekends were made for slovenliness – the respite before the manic new week ahead.  I use the time to treat my skin to a bit …

FOTD Busting out of the comfort zone!

Weekends were made for slovenliness – the respite before the manic new week ahead.  I use the time to treat my skin to a bit …

Dear Obesity...

Weekends were made for slovenliness – the respite before the manic new week ahead.  I use the time to treat my skin to a bit …

Urban Decay The Black Palette - Photos & Swatches

Weekends were made for slovenliness – the respite before the manic new week ahead.  I use the time to treat my skin to a bit …

COMMENTS

  • Categories

  • Archives

  • Admin

  • Ads